Firebaseでアプリサーバーを実装する
こんにちは。LINE PlanetでiOS/macOSとFlutter PlanetKitを担当しているチョン・ジュホンです。
LINE Planetは、リアルタイムサービスとしてのコミュニケーションプラットフォーム(CPaaS)で、リアルタイムの音声およびビデオ通話機能をサービスに導入できるクラウドプラットフォームとクライアントSDKを提供します。
LINE Planetを使用しようとする各サービスは、LINE Planetとユーザーおよびデバイスを接続するための独自のアプリサーバーをアプリケーションレイヤーに実装する必要があります。今回の記事では、Firebaseを使用したアプリサーバーの実装方法の概要を紹介します。
アプリサーバーの定義と役割
LINE Planetで「アプリサーバー」とは、各ユーザーが自分のサービスのために実装するアプリケーションレイヤーのサーバーを指します。
アプリサーバーの主な役割は次のとおりです。
- クライアントがLINE Planetを安全に使用できるように、PlanetKitアクセストークンを発行します。
- LINE Planetから通話関連のコールバックを受信します。
- それぞれ選択したプッシュインフラを使用して、適切なデバイスに通話着信通知を送信します。
- サービスのバックエンドからデバイスと通話情報を収集し、動作状態を監視/デバッグ/分析します。

Firebaseと使用機能の紹介
Firebaseとは、Googleが提供するクラウドベースのバックエンドサービスプラットフォーム(backend as a service、BaaS)で、ウェブやモバイルアプリの開発時によく使用されるサーバー側の機能を予め実装して提供するサービスです。Firebaseを利用することで、インフラ作業を軽減でき、簡単に拡張できるアプリサーバーを実装できます。
この記事で紹介するアプリサーバーの実装には、次の3つのFirebase製品を使用します。
各製品を1つずつ簡単に紹介します。
Cloud Functionsと2つの呼び出し方法
Cloud Functionsは、サーバーなしでバックエンドコードを実行できるようにするサービスです。バックエンドコードを作成してクラウドインフラに保存し、他のFirebase機能やDBの変更、HTTPS呼び出しなどのイベントをトリガーとして設定しておくと、イベント発生時にそのコードがFirebaseのマネージド環境で自動的に実行されます。
この記事で紹介するアプリサーバーは、すべてのエンドポイントをCloud Functionsとして実装し、これらのエンドポイントは2つの方法で呼び出すことができます。
1つ目は、直接HTTPSで呼び出す方法です。各関数は次のURLで公開されており、どのHTTPクライアントでもこのエンドポイントを呼び出すことができます。セキュリティを確保するために、アプリサーバーは短期アプリサーバーアクセストークンを発行し、トークン発行以外のHTTP APIはAuthorization: Bearer <token>と共に呼び出す必要があります。この方法は、サーバー間での統合およびソフトウェアツールの開発に便利です。
[CODE SNIPPET: Example HTTPS endpoint URL]
https://<region>-<project-id>.cloudfunctions.net/registerDevice
2つ目は、Firebase呼び出し可能関数(callable function)を使用する方法です。AndroidやiOS、Web、またはFlutterでクライアントはFunctionsインスタンスを取得し、次のように呼び出すことができます。この方法は、認証および転送をFirebaseが処理します。そのため、アプリサーバーからクライアントにアプリサーバーアクセストークンを発行する必要はありません。Firebase SDKをサポートするプラットフォームで使用する場合に推奨される方法です。
let functions = Functions.functions(region: "asia-northeast1")
let registerDevice = functions.httpsCallable("registerDevice")
registerDevice.call(requestData) { result, error in … }
Cloud Firestore
Cloud Firestoreは、Firebaseが提供するGoogle Cloudベースの拡張可能なNoSQLクラウドデータベースです。ここではアプリサーバーのデータベースとして使用し、デバイス登録と受信通話エントリー(Firestoreベースの仮想プッシュ)、通話イベントログなどを保存します。正確なコレクションとドキュメント構造は、ソースコードからカスタマイズできます。この記事では、Firestoreがアプリサーバーのステータスとログを保管することを理解しておけば十分です。
FCM
FCMは、Firebaseプラットフォームが提供する無料のメッセージングサービスです。この記事で構築するアプリサーバーでは、Androidや特定のデスクトップやウェブ環境など、FCMをサポートするプラットフォームにプッシュ通知を送るのに使用します。アプリサーバーが受信コールバックを受け取ると、FCMを使用してターゲットのデバイスにデータメッセージを引き渡してクライアントアプリが通話受信UIを表示し、PlanetKit通話確認を行うことができるようにします。
LINE Planet Console
LINE Planet Console(以下、LPC)は、LINE Planet SDKを利用して開発したサービスを管理するためのサービスとして、使用量や通話履歴の確認とサービストラフィックのモニタリング、API keyとコールバックURLの設定および管理機能などを提供します。アプリサーバーを実装後にデプロイするには、LPCに加入してアプリサーバーをデプロイするために必要ないくつかのことを準備する必要があります。以降のアプリサーバーのデプロイ準備セクションで詳しく説明します。
アプリサーバー機能の紹介
このセクションでは、LINE PlanetをPlanetKitと併用するために必須となるコア機能を説明するための最小限のアプリサーバー設計を提示します。この設計は、コアのクライアントAPIとサーバーコールバックを示すための参照実装です。
この記事で提示する設計は、アプリサーバーを構築するための複数のアプローチのうちの一例であり、サービスの要件に応じて以下の事項を追加で実装することが必要な場合があります。
- 認証(authentication)および許可(authorization)レイヤーの追加
- より洗練されたデバイス管理の実装(例:ユーザー別のマルチデバイス処理、デバイス別の設定)
- トラフィック制限および不正利用防止機能の追加
- 通話ルーティング、ユーザー権限、課金などのためのカスタムビジネスロジックの実装
- サービス特性に合わせたデータモデルの拡張
- この記事で扱う基本的なイベントロギング以外のモニタリング、通知、分析機能の追加
また、この記事で提供されているコードスニペットは、コア機能に焦点を当てて簡略化した例です。本番環境で使用するためには、各ユースケースに応じた包括的なエラー処理や入力値検証、ロギング、セキュリティ対策などが必要です。
それでは、アプリサーバーの機能を1つずつ見ていきましょう。
クライアント向けAPI
アプリサーバーは、RegisterDevice、RemoveDevice、IssuePlanetKitAccessToken、IssueAppServerAccessTokenの4つのクライアントAPIを公開します。APIはすべてCloud Functionsとして実装されており、HTTPSとFirebase呼び出し可能関数のいずれからもアクセスできます。
RegisterDevice
特定のユーザーとサービスに対して、デバイスを登録またはアップデートします。これにより、通話受信通知を登録されたデバイスに確実に転送できます。
-
リクエストパラメーター
userId:ユーザー識別子serviceId:LPCから受け取ったサービス識別子deviceType:デバイスプラットフォーム(iOS、Android、Windows(デスクトップ)、Linuxなど)deviceToken:プッシュ通知トークンapplicationUserData:カスタムデータ(任意)
-
応答パラメーター
result:結果コード(SUCCESSまたはエラーコード)message:人が読めるメッセージpath:デバイスが登録されたFirestoreドキュメントパス
サンプルコード
const {onCall} = require("firebase-functions/v2/https");
const admin = require("firebase-admin");
const db = admin.firestore();

const registerDevice = onCall(async (request) => {
  const data = request.data;

  // 1. Validate required fields (userId, serviceId, deviceType, deviceToken)
  const required = ["userId", "serviceId", "deviceType", "deviceToken"];
  for (const field of required) {
    if (!data[field] || data[field].trim() === "") {
      return {
        result: "MISSING_REQUIRED_FIELD",
        message: `Missing required field: ${field}`,
      };
    }
  }

  // 2. Validate service ID exists in configuration
  // 3. Validate device type format
  // 4. Validate device token format

  // 5. Store device registration in Firestore
  // Path: services/{serviceId}/users/{userId}/devices/{deviceType}
  const deviceDoc = {
    deviceToken: data.deviceToken,
    applicationUserData: data.applicationUserData || null,
    registeredAt: admin.firestore.FieldValue.serverTimestamp(),
  };

  await db
    .collection("services")
    .doc(data.serviceId)
    .collection("users")
    .doc(data.userId)
    .collection("devices")
    .doc(data.deviceType)
    .set(deviceDoc);

  return {result: "SUCCESS", message: "Device registered successfully"};
});
RemoveDevice
デバイス登録を削除します。削除後、該当のデバイスは通話受信通知を受け取りません。
-
リクエストパラメーター
userId:ユーザー識別子serviceId:サービス識別子deviceType:削除するデバイスプラットフォーム
-
応答フィールド
result:結果コード(SUCCESS、DEVICE_NOT_FOUND、またはエラーコード)message:人が読めるメッセージ
サンプルコード
const {onCall} = require("firebase-functions/v2/https");
const admin = require("firebase-admin");
const db = admin.firestore();

const removeDevice = onCall(async (request) => {
  const {userId, serviceId, deviceType} = request.data;

  // 1. Validate required fields
  const required = ["userId", "serviceId", "deviceType"];
  for (const field of required) {
    if (!request.data[field] || request.data[field].trim() === "") {
      return {
        result: "MISSING_REQUIRED_FIELD",
        message: `Missing required field: ${field}`,
      };
    }
  }

  // 2. Check if device exists
  const devicePath = db
    .collection("services")
    .doc(serviceId)
    .collection("users")
    .doc(userId)
    .collection("devices")
    .doc(deviceType);

  const deviceDoc = await devicePath.get();
  if (!deviceDoc.exists) {
    return {result: "DEVICE_NOT_FOUND", message: "Device not found"};
  }

  // 3. Delete the device document
  await devicePath.delete();

  // 4. Clean up user document if no devices remain
  const remainingDevices = await db
    .collection("services")
    .doc(serviceId)
    .collection("users")
    .doc(userId)
    .collection("devices")
    .get();

  if (remainingDevices.empty) {
    await db.collection("services").doc(serviceId)
      .collection("users").doc(userId).delete();
  }

  return {result: "SUCCESS", message: "Device removed successfully"};
});
IssuePlanetKitAccessToken
入力されたユーザーとサービスに対して短期(short-lived)PlanetKitアクセストークンを発行します。このトークンは、PlanetKitで通話を開始、受諾、参加する際に使用されます。
-
リクエストパラメーター
userId:ユーザー識別子serviceId:サービス識別子
-
応答パラメーター
result:結果コード(SUCCESSまたはエラーコード)message:人が読めるメッセージaccessToken:PlanetKit認証用のJWTトークン
サンプルコード
const {onCall} = require("firebase-functions/v2/https");
const jwt = require("jsonwebtoken");

// Service configuration should be loaded from a secure config file
// Example structure: {"serviceId": {"apiKey": "...", "apiSecret": "..."}}
const serviceConfigs = require("./config/services.json");

const issuePlanetKitAccessToken = onCall(async (request) => {
  const {userId, serviceId} = request.data;

  // 1. Validate required fields
  if (!userId || !serviceId) {
    return {
      result: "MISSING_REQUIRED_FIELD",
      message: "userId and serviceId are required",
    };
  }

  // 2. Get API credentials from service configuration
  const credentials = serviceConfigs[serviceId];
  if (!credentials || !credentials.apiKey || !credentials.apiSecret) {
    return {
      result: "INVALID_SERVICE_ID",
      message: "Service configuration not found",
    };
  }

  // 3. Create JWT payload
  const payload = {
    sub: serviceId,              // subject: serviceId
    iss: credentials.apiKey,     // issuer: apiKey from LPC
    iat: Math.floor(Date.now() / 1000),  // issued at
    uid: userId,                 // user identifier
  };

  // 4. Sign with HMAC256 using API secret from LPC
  const token = jwt.sign(payload, credentials.apiSecret, {
    algorithm: "HS256",
    header: {typ: "JWT"},
  });

  return {
    result: "SUCCESS",
    message: "Access token generated successfully",
    accessToken: token,
  };
});
IssueAppServerAccessToken (optional)
他のアプリサーバーAPIに直接HTTPSリクエストを送る場合に認証するための短期アプリサーバーアクセストークンを発行します。Firebase呼び出し可能関数を使用しない場合にのみ必要です。
-
リクエストパラメーター
serviceId:サービス識別子APIKey:LPCから受信した認証のためのAPIキー
-
応答パラメーター
result:結果コード(SUCCESS、INVALID_API_KEY、またはエラーコード)message:人が読めるメッセージaccessToken:アプリサーバーAPI認証用のJWTトークン
サンプルコード
const {onRequest} = require("firebase-functions/v2/https");
const jwt = require("jsonwebtoken");

// Service configuration should be loaded from a secure config file
const serviceConfigs = require("./config/services.json");

const issueAppServerAccessToken = onRequest(async (req, res) => {
  const {serviceId, APIKey} = req.body;

  // 1. Validate API key matches service configuration
  const credentials = serviceConfigs[serviceId];
  if (!credentials || APIKey !== credentials.apiKey) {
    return res.status(401).json({
      result: "INVALID_API_KEY",
      message: "Invalid API key",
    });
  }

  // 2. Create JWT with expiration (e.g., 1 hour)
  const now = Math.floor(Date.now() / 1000);
  const payload = {
    sub: serviceId,
    iss: "app-server",
    iat: now,
    exp: now + 3600,  // 1 hour expiration
    type: "app-server-token",
  };

  const token = jwt.sign(payload, credentials.apiSecret, {
    algorithm: "HS256",
  });

  res.json({
    result: "SUCCESS",
    message: "App server access token generated successfully",
    accessToken: token,
  });
});
サーバーコールバック
LINE Planetクラウドは、通話関連のイベントが発生するとアプリサーバーを呼び出します。これはサーバーコールバックと呼ばれ、クエリパラメーターを含むGETリクエストを受けるHTTPSトリガーをサポートするCloud Functionsとして実装されます。
ペイロード全体の構造とフィールド仕様については、LINE Planet Callbacksドキュメントを参照してください。
notifyCallback
ユーザーに電話がかかってきたときに呼び出されます。このコールバックが呼び出されると、アプリサーバーは該当ユーザーとして登録されているデバイスを検索し、APNsまたはFCMを介して通知を送信して、クライアントが通話受信画面を表示し、PlanetKitで通話を検証できるようにする必要があります。
- リクエストパラメーター(
GETクエリ文字列)sid:セッションID(36桁)from_service_id:発信者のサービスIDfrom_user_id:発信者のユーザーIDto_service_id:受信者のサービスIDto_user_id:受信者のユーザーIDtype:通話タイプ(「A」:音声、「V」:ビデオ)param:cc_paramでPlanetKitに引き渡す必要のある通話検証パラメーターapp_svr_data:アプリケーションデータ(任意)
- 認証
- LPCで設定されたキーと値のペアを含むカスタムヘッダー
サンプルコード
const {onRequest} = require("firebase-functions/v2/https");
const admin = require("firebase-admin");
const db = admin.firestore();

// Authentication configuration for callbacks
const CALLBACK_AUTH_HEADER = "your-callback-auth-header";
const CALLBACK_AUTH_VALUE = "your-secret-value";

const notifyCallback = onRequest({cors: true}, async (req, res) => {
  // 1. Validate authentication header
  const authHeader = req.headers[CALLBACK_AUTH_HEADER.toLowerCase()];
  if (authHeader !== CALLBACK_AUTH_VALUE) {
    return res.status(401).json({
      result: "INVALID_CALLBACK_AUTH",
      message: "Invalid callback authentication",
    });
  }

  // 2. Parse and validate query parameters
  const {sid, from_service_id, from_user_id, to_service_id,
         to_user_id, type, param, app_svr_data} = req.query;

  // 3. Validate both users exist in registered devices
  const fromUserExists = await checkUserExists(from_service_id, from_user_id);
  const toUserExists = await checkUserExists(to_service_id, to_user_id);

  if (!fromUserExists || !toUserExists) {
    return res.status(404).json({
      result: "USER_NOT_FOUND",
      message: "User not found",
    });
  }

  // 4. Store callback data in Firestore for logging
  const callbackDoc = {
    sid,
    from_service_id,
    from_user_id,
    to_service_id,
    to_user_id,
    type,
    cc_param: param,  // Renamed for clarity
    app_svr_data,
    receivedAt: admin.firestore.FieldValue.serverTimestamp(),
  };

  await db.collection("notify_callbacks").add(callbackDoc);

  // 5. Send push notifications to callee's devices
  // This function looks up all devices for to_user_id and sends:
  // - APNs VoIP push for iOS devices
  // - FCM data message for Android devices
  const pushResult = await sendPushNotificationsToUser(
    to_service_id,
    to_user_id,
    callbackDoc,
    sid
  );

  res.json({
    result: "SUCCESS",
    message: "Notify callback processed successfully",
    pushNotifications: pushResult,
  });
});

// Helper function to check if user exists
async function checkUserExists(serviceId, userId) {
  const userDoc = await db
    .collection("services")
    .doc(serviceId)
    .collection("users")
    .doc(userId)
    .get();
  return userDoc.exists;
}
callEventCallback
1対1通話が切断される時に呼び出されます。この際、アプリサーバーは開始時刻、切断時刻、通話持続時間、通話切断の理由などの通話統計をFirestoreに記録し、以降のモニタリングと分析に使用できます。各パラメーターの詳細については、1対1通話イベントコールバックドキュメントを参照してください。
- リクエストパラメーター(
GETクエリ文字列)sid:セッションIDfrom_service_id、from_user_id:発信者識別子to_service_id、to_user_id:受信者識別子type:メディアタイプ(「A」または「V」)setup_time、start_time、end_time:通話の作成、開始、切断時刻(Unixタイムスタンプ)duration:通話持続時間(秒)srcip、dstip:発信者、受信者IPアドレスterminate:Q.850原因コードrel_code:通話詳細解除コードrel_code_str:通話詳細解除メッセージbilling_sec:ユーザーに料金が請求される通話時間(秒)disconnect_reason:通話切断の理由releaser_type:通話切断のソースタイプ- その他追加できるフィールド:
rc_idc(発信者を処理したIDC(インターネットデータセンター))、user_rel_code(アプリケーションが定義した通話解除コード)、app_svr_data(アプリケーションデータ)など
サンプルコード
const {onRequest} = require("firebase-functions/v2/https");
const admin = require("firebase-admin");
const db = admin.firestore();

// Authentication configuration for callbacks
const CALLBACK_AUTH_HEADER = "your-callback-auth-header";
const CALLBACK_AUTH_VALUE = "your-secret-value";

const callEventCallback = onRequest({cors: true}, async (req, res) => {
  // 1. Validate authentication header
  const authHeader = req.headers[CALLBACK_AUTH_HEADER.toLowerCase()];
  if (authHeader !== CALLBACK_AUTH_VALUE) {
    return res.status(401).json({
      result: "INVALID_CALLBACK_AUTH",
      message: "Invalid callback authentication",
    });
  }

  // 2. Parse query parameters
  const data = req.query;

  // 3. Validate users exist
  const fromUserExists = await checkUserExists(
    data.from_service_id,
    data.from_user_id
  );
  const toUserExists = await checkUserExists(
    data.to_service_id,
    data.to_user_id
  );

  if (!fromUserExists || !toUserExists) {
    return res.status(404).json({
      result: "USER_NOT_FOUND",
      message: "User not found",
    });
  }

  // 4. Store call event in Firestore for analytics
  const callEventDoc = {
    sid: data.sid,
    from_service_id: data.from_service_id,
    from_user_id: data.from_user_id,
    to_service_id: data.to_service_id,
    to_user_id: data.to_user_id,
    type: data.type,
    setup_time: parseInt(data.setup_time, 10),
    start_time: parseInt(data.start_time, 10),
    end_time: parseInt(data.end_time, 10),
    duration: parseInt(data.duration, 10),
    srcip: data.srcip,
    dstip: data.dstip,
    terminate: parseInt(data.terminate, 10),
    rel_code: parseInt(data.rel_code, 10),
    rel_code_str: data.rel_code_str,
    billing_sec: parseInt(data.billing_sec, 10),
    disconnect_reason: parseInt(data.disconnect_reason, 10),
    releaser_type: parseInt(data.releaser_type, 10),
    receivedAt: admin.firestore.FieldValue.serverTimestamp(),
  };

  await db.collection("call_events").add(callEventDoc);

  res.json({
    result: "SUCCESS",
    message: "Call event callback processed successfully",
  });
});

// Helper function to check if user exists
async function checkUserExists(serviceId, userId) {
  const userDoc = await db
    .collection("services")
    .doc(serviceId)
    .collection("users")
    .doc(userId)
    .get();
  return userDoc.exists;
}
groupCallEventCallback
参加者の参加、退出、または通話切断など、グループ通話イベント発生時に呼び出されます。この際、アプリサーバーはグループ通話の動作を分析するためのセッション別の要約情報と詳細なイベントログを保管します。各パラメーターの詳細については、グループ通話イベントコールバックドキュメントを参照してください。
- リクエストパラメーター(
GETクエリ文字列)sid:セッションID(グループ通話用32~36桁)svc_id:グループ通話サービスIDid:グループ通話IDuser_svc_id、user_id:参加者識別子host_svc_id、host_id:ホスト識別子sc:グループ通話ステータスコード(「S」:開始済み、「C」:変更済み、「E」:切断済み)msc:参加者ステータスコード(「C」:接続済み、「D」:接続解除済み、「T」:タイムアウト、「M」:メディア変更済み)setup_time、start_time、end_time:通話の作成、開始、切断時刻online:オンライン参加者数media_type:メディアタイプ(「A」または「V」)ts:イベントタイムスタンプ- その他追加できるフィールド:
ue_type(ユーザー端末タイプ)、display_name(ユーザー端末表示名)、mtg_data(ミーティング作成時に指定したミーティングデータ)など
サンプルコード
const {onRequest} = require("firebase-functions/v2/https");
const admin = require("firebase-admin");
const db = admin.firestore();

// Authentication configuration for callbacks
const CALLBACK_AUTH_HEADER = "your-callback-auth-header";
const CALLBACK_AUTH_VALUE = "your-secret-value";

const groupCallEventCallback = onRequest({cors: true}, async (req, res) => {
  // 1. Validate authentication header
  const authHeader = req.headers[CALLBACK_AUTH_HEADER.toLowerCase()];
  if (authHeader !== CALLBACK_AUTH_VALUE) {
    return res.status(401).json({
      result: "INVALID_CALLBACK_AUTH",
      message: "Invalid callback authentication",
    });
  }

  // 2. Parse and validate query parameters
  const data = req.query;

  // 3. Validate user and host exist
  const userExists = await checkUserExists(data.user_svc_id, data.user_id);
  const hostExists = await checkUserExists(data.host_svc_id, data.host_id);

  if (!userExists || !hostExists) {
    return res.status(404).json({
      result: "USER_NOT_FOUND",
      message: "User not found",
    });
  }

  // 4. Store event in session-based structure for accumulation
  // Structure: group_call_events/{sid}/events/{auto-id}
  const groupCallEventDoc = {
    sid: data.sid,
    svc_id: data.svc_id,
    id: data.id,
    user_svc_id: data.user_svc_id,
    user_id: data.user_id,
    host_svc_id: data.host_svc_id,
    host_id: data.host_id,
    sc: data.sc,
    msc: data.msc,
    setup_time: parseInt(data.setup_time, 10),
    start_time: parseInt(data.start_time, 10),
    end_time: parseInt(data.end_time, 10),
    online: parseInt(data.online, 10),
    media_type: data.media_type,
    ts: parseInt(data.ts, 10),
    receivedAt: admin.firestore.FieldValue.serverTimestamp(),
  };

  const sessionRef = db.collection("group_call_events").doc(data.sid);

  // Add event to subcollection
  await sessionRef.collection("events").add(groupCallEventDoc);

  // 5. Update session summary document
  const sessionSummary = {
    sid: data.sid,
    svc_id: data.svc_id,
    group_call_id: data.id,
    host_svc_id: data.host_svc_id,
    host_id: data.host_id,
    media_type: data.media_type,
    latest_sc: data.sc,
    latest_online_count: parseInt(data.online, 10),
    setup_time: parseInt(data.setup_time, 10),
    latest_event_time: parseInt(data.ts, 10),
    call_ended: data.sc === "E",
    lastUpdatedAt: admin.firestore.FieldValue.serverTimestamp(),
    total_events: admin.firestore.FieldValue.increment(1),
  };

  await sessionRef.set(sessionSummary, {merge: true});

  res.json({
    result: "SUCCESS",
    message: "Group call event callback processed successfully",
  });
});

// Helper function to check if user exists
async function checkUserExists(serviceId, userId) {
  const userDoc = await db
    .collection("services")
    .doc(serviceId)
    .collection("users")
    .doc(userId)
    .get();
  return userDoc.exists;
}
アプリサーバーのデプロイ準備
アプリサーバーをデプロイする前に、2つの準備が必要です。1つは、LINE Planetプロジェクトを設定するためのLINE Planet Console(以下、LPC)に加入して必要なものを準備すること、もう1つはアプリサーバーをホストするためのFirebaseを準備することです。この2つを準備することで、アプリサーバーのソースコードが構成されます。それぞれをどのように準備すればよいかを見ていきましょう。
LPC
LPCの加入とログイン
LPCはLINE Planetプロジェクトを作成し管理するところです。ブラウザで以下のLPCウェブサイトにアクセスし、加入してログインします。
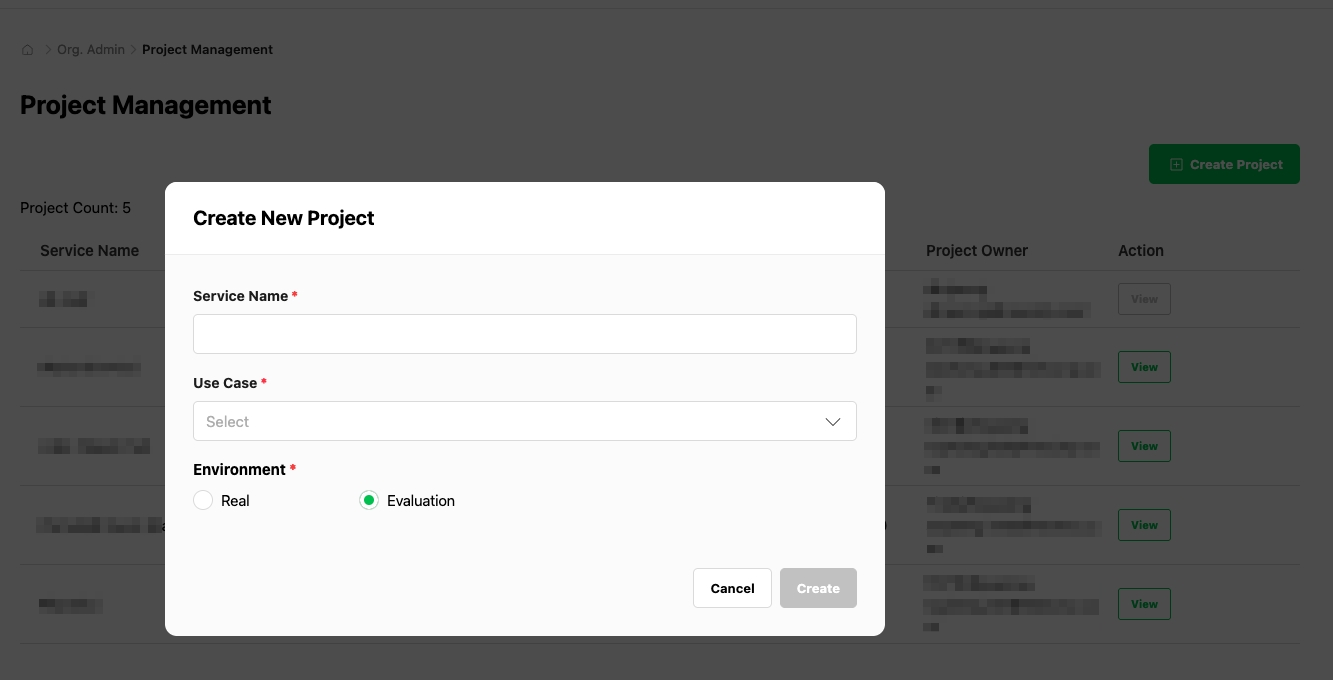
サービスID取得
LINE Planet連携時にLINE Planetが提供する2つの実行環境(Evaluation/Real)を選択して適用します。
- Evaluation環境(評価)
- 「Evaluation環境」とは、LINE Planetが提供する別途の検証/テスト用環境を意味します(各サービス会社が別途で運用する評価(ステージング)環境を指すものではありません)。実際の運用トラフィックを適用する前に連携開発、機能検証、QA、社内テストなどに使用できます。
- LPCからサービスIDを取得できます。
- Real環境(運用)
- 実際のユーザートラフィックを処理する運用(プロダクション)環境で、サービスのオープンおよび運用段階で使用します。
- Real環境はLINE Planetチーム(メール:dl_planet_help@linecorp.com)に問い合わせた上で利用できます。
推奨の流れは、Evaluation環境で連携および検証を完了した後、運用準備が完了したらReal環境に切り替える方法です。
APIキーおよびシークレットの発行
同じLPCプロジェクトでサービス用のAPIキーとAPIシークレットを発行します。APIキーとAPIシークレットは、アプリサーバーがサービスのためにLINE Planetクラウドと通信する際に使用するもので、後続のアプリサーバーを構成する時に必要なので安全に保存しておきます。
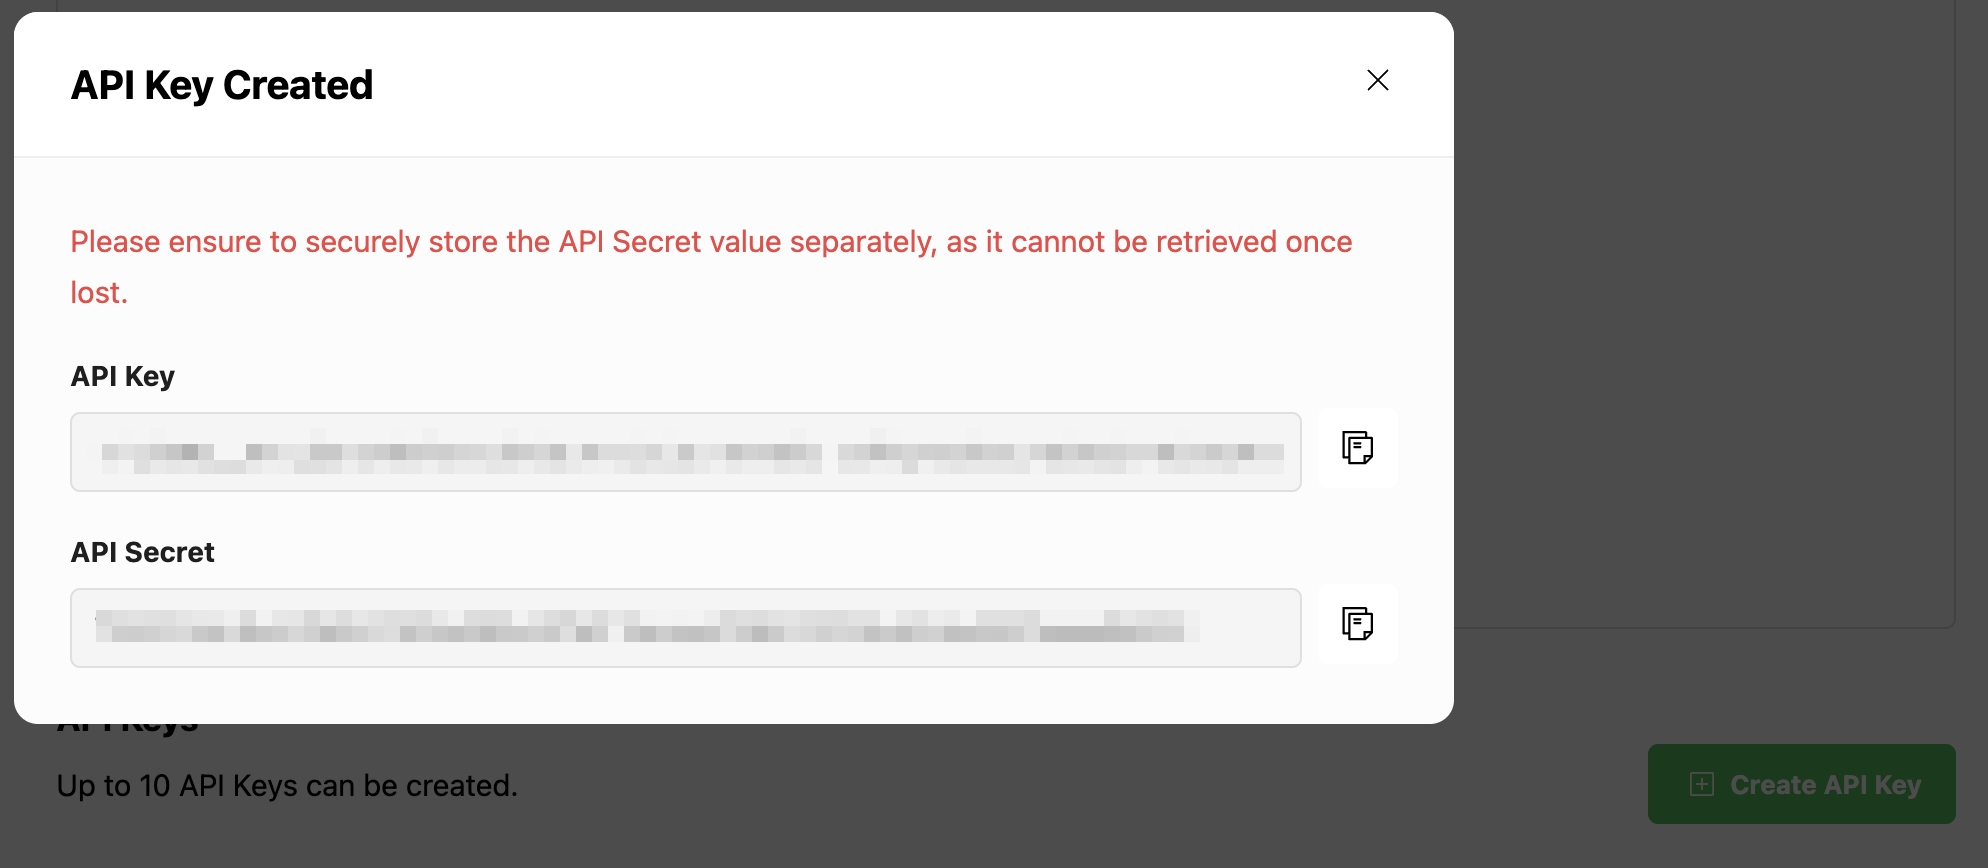
注:このダイアログを閉じる前に、必ずAPIシークレットをコピーして保存してください。ダイアログを閉じると、このAPIシークレットを再度確認することはできません。
Firebase
Firebaseプロジェクトの準備
サービスですでにFirebaseを使用している場合は、アプリサーバーで既存のプロジェクトを再利用できます。この場合、プロジェクトの作成をスキップし、アプリがすでに接続されている既存のFirebaseプロジェクトを使用します。まだFirebaseプロジェクトがない場合は、LINE Planetアプリサーバー専用の新しいプロジェクトを作成します。このプロジェクトは、アプリサーバーで使用されるCloud FunctionsとFirestoreデータベースをホスティングするためのものです。
詳細については、以下のFirebase公式ガイドを参照してください。
Firebase Cloud Functionsの有効化
FirebaseコンソールでFunctionsセクションを開きます。必要に応じてCloud Functionsを使用できるプラン(例:Blaze)に切り替えます。FunctionsセクションでCloud Functionsが有効になっており、Firebase CLIがこのプロジェクトにデプロイできることを確認します。
詳細については、以下のFirebase公式ガイドを参照してください。
Firestoreの有効化
Firestore Databaseセクションを開いてまだ有効になっていない場合は、データベースを作成します。asia-northeast1などの適切なリージョンを選択し、初期セキュリティモードを設定します。このデータベースは、アプリサーバーでデバイスの登録と通話イベントを保存する際に使用されます。
詳細については、以下のFirebase公式ガイドを参照してください。
ご希望のプラットフォームのプッシュ設定
iOSとiPadOSの場合は、Apple DeveloperポータルでAPNs Auth Key(.p8)を取得後にAppleプラットフォーム用のFCMを構成します。Androidの場合は、Firebaseにアプリを登録してgoogle-services.jsonをダウンロードした後、クライアントプロジェクトでFCMを構成します。デスクトップやその他プラットフォームの場合は、FCMまたはFirestoreベースの通知を使用するかどうかを決めます。
設定手順については、以下のFirebase公式ガイドを参照してください。
アプリサーバーのデプロイ
前述のアプリサーバー機能の紹介セクションで紹介したパターンでアプリサーバー関数をすべて実装したら、次はアプリサーバー関数をFirebaseにデプロイし、LINE Planetクラウドに接続できます。
Cloud Functionsの実装
アプリサーバー機能の紹介セクションで紹介したコードスニペットを参照して、以下のFirebase用Cloud Functionsをプロジェクトに実装してください。
- クライアントAPI
registerDevice(Firebase呼び出し可能関数)registerDeviceHttp(認証方式HTTP)removeDevice(Firebase呼び出し可能関数)removeDeviceHttp(認証方式HTTP)issuePlanetKitAccessToken(Firebase呼び出し可能関数)issuePlanetKitAccessTokenHttp(認証方式HTTP)issueAppServerAccessToken(HTTP)
- サーバーコールバック
notifyCallback(HTTPGETエンドポイント)callEventCallback(HTTPGETエンドポイント)groupCallEventCallback(HTTPGETエンドポイント)
- 必須設定
- サーバーコールバック認証ヘッダーの設定(キーと値のペア)
- サービス資格情報の設定(LPCから受け取ったAPIキーとAPIシークレット)
- iOSプッシュ用のAPNs資格情報の設定(iOSサポート時)
- デバイス登録およびイベントロギングのためのFirestoreコレクションの設定
Cloud Functionsのデプロイ
次のコマンドをfunctionsディレクトリでFirebase CLIを使用して実行して、すべての関数をデプロイします。
firebase deploy --only functions
特定の関数だけをデプロイしたい場合は、次のように実行します。
firebase deploy --only functions:registerDevice
ログは次のコマンドで確認できます。
firebase functions:log
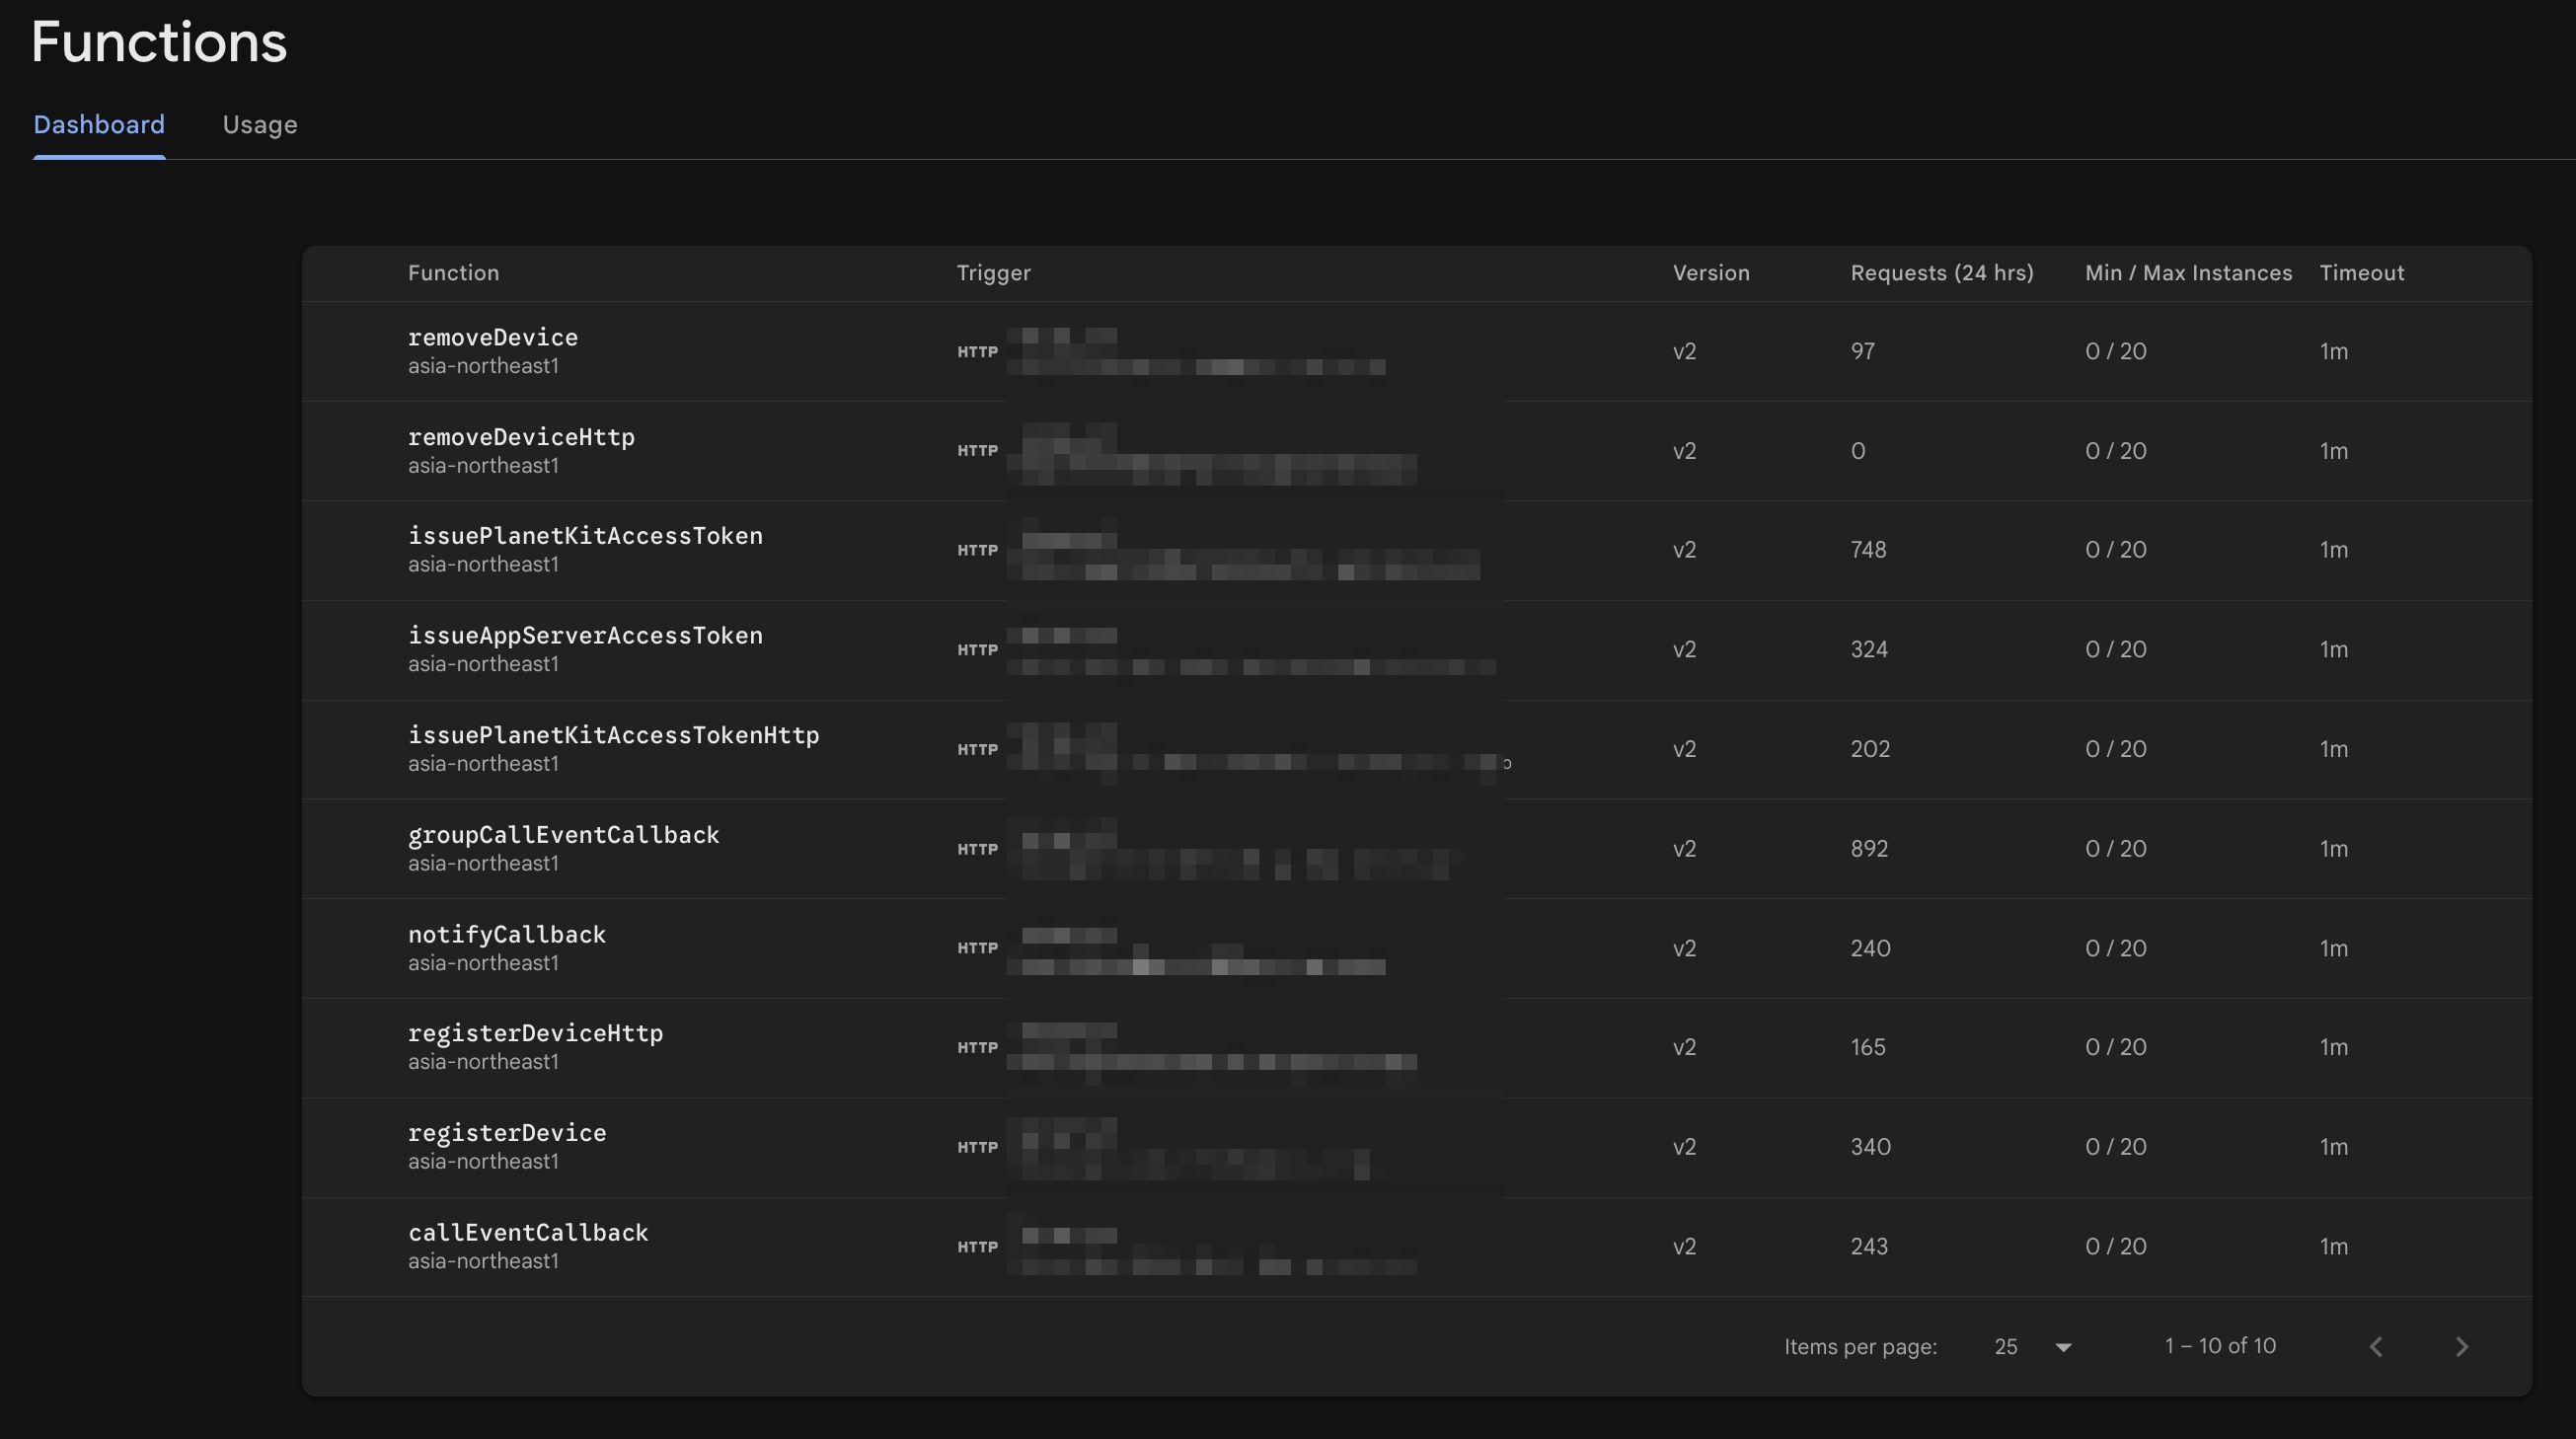
コールバックおよびヘッダーの登録
Cloud Functionsをデプロイした後、FirebaseコンソールのFunctionsタブにURLが表示されたら、LPCにコールバックを登録する必要があります。
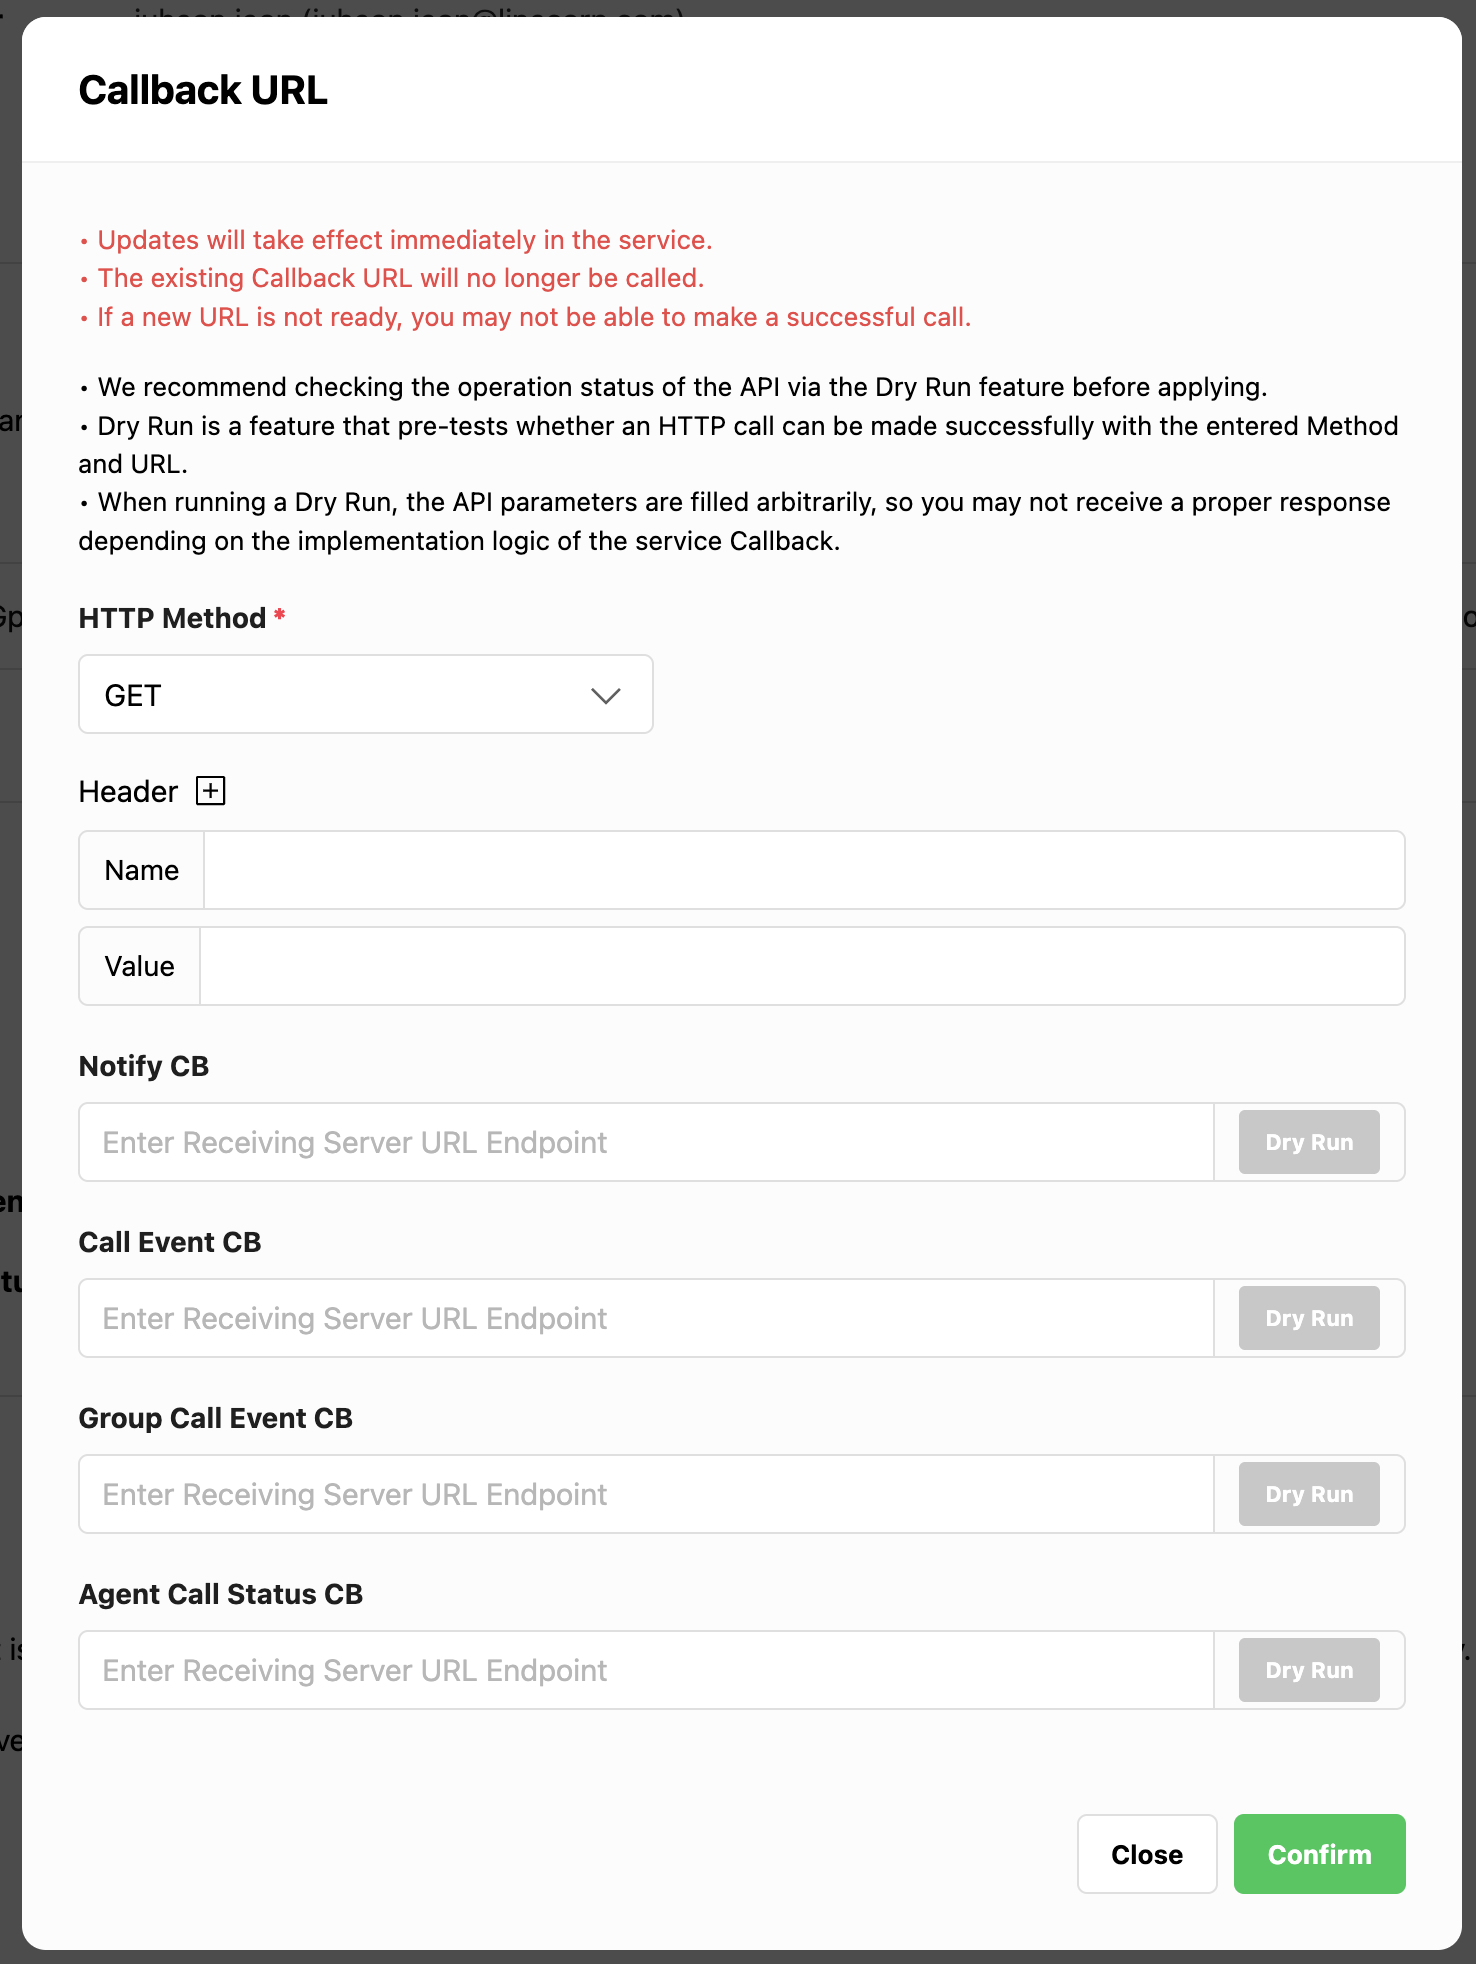
LPCでサービスのコールバック構成ページを開き、次の設定を行います。
notifyCallbackのURLを該当のCloud Functionに設定callEventCallbackのURLを該当のCloud Functionに設定- グループ通話を使用する場合、
groupCallEventCallbackのURLを設定
設定が完了したら、認証ヘッダーをconstants.jsのSERVER_CALLBACK_AUTH値と一致するように設定します(例:キーplanetとシークレット値)。保存すると、LINE Planetクラウドがアプリサーバーを呼び出すことができ、アプリサーバーは該当のリクエストが本物であるか検証できます。
クライアントアプリとアプリサーバーの連携
デプロイおよびコールバックの登録が完了したら、クライアントアプリケーションでアプリサーバーを使用できます。
Firebase SDKの統合
Androidでは、GradleにFirebase FunctionsとMessagingを含みます。iOSでは、CocoaPods(またはSwift Package Manager)を通じて、FirebaseCore、FirebaseFunctions、FirebaseMessagingを含みます。その後、Firebaseを初期化し、適切なリージョンでFunctionsインスタンスを作成します。
[CODE SNIPPET: Android Firebase dependencies]
implementation platform("com.google.firebase:firebase-bom:<VERSION>")
implementation "com.google.firebase:firebase-functions"
implementation "com.google.firebase:firebase-messaging"
[CODE SNIPPET: iOS Firebase dependencies]
pod 'Firebase/Core'
pod 'Firebase/Functions'
pod 'Firebase/Messaging'
[CODE SNIPPET: Swift – Functions instance]
import FirebaseFunctions

let functions = Functions.functions(region: "asia-northeast1")
[CODE SNIPPET: Kotlin – Functions instance]
import com.google.firebase.functions.ktx.functions
import com.google.firebase.ktx.Firebase

val functions = Firebase.functions("asia-northeast1")
Swift/Kotlinの例:通話の発信(通話の作成および検証)
クライアント側の基本パターンは簡単です。
- ユーザーがログインしてプッシュトークンを使用できるようになったら、デバイスを登録します。
- 通話を発信または確認する前に、PlanetKitアクセストークンをリクエストします。
- トークンとコールバックパラメーターをPlanetKitに引き渡します。
Swiftの例
[CODE SNIPPET: Swift – register device and issue token]

// On user login or push token update, call registerDevice.
let registerDevice = functions.httpsCallable("registerDevice")
let registerData: [String: Any] = [
  "userId": "user123",
  "serviceId": "<SERVICE_ID>",
  "deviceType": "IOS",
  "pushType": "PUSHKIT",
  "deviceToken": "<PUSH_TOKEN>",
  "pushkitEnvironment": "DEBUG"
]
registerDevice.call(registerData) { result, error in
  // Handle result or error
}

// Before making or verifying a call, call issuePlanetKitAccessToken
let issueToken = functions.httpsCallable("issuePlanetKitAccessToken")
let tokenData: [String: Any] = [
  "userId": "user123",
  "serviceId": "<SERVICE_ID>"
]
issueToken.call(tokenData) { result, error in
  // Extract "accessToken" and pass it to PlanetKit
}
Kotlinの例
// On user login or push token update, call registerDevice.
val registerData = hashMapOf(
    "userId" to "user123",
    "serviceId" to "<SERVICE_ID>",
    "deviceType" to "ANDROID",
    "pushType" to "FCM",
    "deviceToken" to "<FCM_TOKEN>"
)
functions
    .getHttpsCallable("registerDevice")
    .call(registerData)
    .addOnSuccessListener { /* Handle success */ }
    .addOnFailureListener { /* Handle error */ }

// Before making or verifying a call, call issuePlanetKitAccessToken
val tokenData = hashMapOf(
    "userId" to "user123",
    "serviceId" to "<SERVICE_ID>"
)
functions
    .getHttpsCallable("issuePlanetKitAccessToken")
    .call(tokenData)
    .addOnSuccessListener { result ->
        // Extract "accessToken" and pass it to PlanetKit
    }
    .addOnFailureListener { /* Handle error */ }
通話の受信も上記のパターンに似ています。LINE PlanetクラウドがnotifyCallbackを呼び出すと、アプリサーバーはプッシュを送信し、クライアントはそれを受け取り、通話受信UIを表示してからPlanetKitアクセストークンを取得してPlanetKitを介して通話を確認します。
通話検証時にcc_paramなどのフィールドを使用する方法など、PlanetKitの詳細な使用方法については、PlanetKit SDKドキュメントを参照してください。
終わりに
この記事では、Firebaseを使用してLINE Planetの活用に必要なアプリサーバーを実装するための概要ガイドを紹介しました。Firebaseを使用してアプリサーバーを実装すると、次のような利点があります。
- 作業効率の向上:サーバーのプロビジョニングやOSの管理、認証など、サーバーの構築および運用に必要な複数の面倒な作業を省略できます。
- 拡張性の向上:Firebaseはトラフィックの量に応じてサーバーリソースを自動的に拡張するため、トラフィックが急増した場合でも追加対応なしで安定したサービスを提供できます。
この利点のおかげで、開発者はインフラ管理に時間を費やすことなく、コアビジネスロジックにより集中できます。この記事ではFirebaseを中心に説明しましたが、アーキテクチャパターンとコアロジックは、AWS LambdaやAzure Functionsなどの他のサーバーレスプラットフォームにも適用可能であり、API設計やコールバックフローを利用環境に合わせて応用できます。
最後に、この記事の主要ポイントをまとめると、以下のとおりです。
- アプリサーバーの役割
- クライアントAPIの提供
- LINE Planetクラウドからコールバックを受信
- プッシュで通話受信通知を受信側(クライアント)アプリに転送
- アプリサーバーの実装には2つの方法(HTTPS、Firebase呼び出し可能関数)で呼び出すことができるFirebase Cloud Functionsを使用し、アプリサーバーのデータリポジトリとしてはCloud Firestoreを使用します。
- LINE Planetが要求するアプリサーバー機能のための最小限のAPI設計
- クライアントAPI(
RegisterDevice、RemoveDevice、IssuePlanetKitAccessToken、IssueAppServerAccessToken)- コア検証、トークン生成、Firestoreの操作を確認できるコードスニペットを含む
- サーバーコールバック(
notifyCallback、callEventCallback、groupCallEventCallback)- 認証、データ検証、イベントロギング、プッシュ通知パターンを確認できるコードスニペットを含む
- クライアントAPI(
- LPCとFirebaseを準備し、関数を実装してデプロイし、コールバックを登録する具体的なプロセス
- クライアントアプリがFirebase SDKを介してアプリサーバーを呼び出した後、PlanetKitと共にその結果を使用する方法を把握するための基本的な例
この記事で紹介したFirebase基盤のLINE Planetアプリサーバー実装ガイドに関する質問やフィードバックがある場合は、以下のメールまでお問い合わせください。