Building an app server with Firebase
Hello, I'm Juheon Jeon, responsible for iOS/macOS and Flutter PlanetKit at LINE Planet.
LINE Planet is a real-time communications platform as a service (CPaaS) that provides the cloud platform and client SDKs needed to integrate real-time voice and video calling into services.
To use LINE Planet, each service must implement its own app server on the application layer to connect LINE Planet with the service's users and devices. This post introduces a high-level guide to implementing the app server using Firebase, with minimal code examples showing the core API design and implementation patterns.
What is an app server?
In LINE Planet, "app server" refers to an application-layer server implemented by each LINE Planet user for their own service.
The main roles of the app server are as follows:
- Issues PlanetKit access tokens so clients can use LINE Planet securely.
- Receives call-related callbacks from LINE Planet.
- Sends incoming call notifications to the appropriate devices using the service's chosen push infrastructure.
- Receives device and call information in the service's backend so that behavior can be monitored, debugged, and analyzed.

Introduction to Firebase and the features used
Firebase is a cloud-based backend service platform (backend as a service, BaaS) provided by Google, a service that pre-implements and provides server-side functions commonly used when developing web or mobile apps. Using Firebase, you can reduce infrastructure work and implement an app server that can be easily scaled.
The app server implementation introduced in this post uses the following three Firebase products:
- Cloud Functions for Firebase (hereinafter Cloud Functions)
- Cloud Firestore
- Firebase Cloud Messaging (FCM)
Let me briefly introduce each product one by one.
Cloud Functions and two types of calling methods
Cloud Functions is a service that allows you to run backend code without a dedicated server. If you write backend code, deploy it to cloud infrastructure, and set up events such as other Firebase features, database changes, or HTTPS calls as triggers, the code automatically runs in a managed environment provided by Firebase when the event occurs.
The app server introduced in this post implements all endpoints as Cloud Functions, and there are two ways to call these endpoints.
The first is direct HTTPS request. Each function is exposed as a URL such as:
[CODE SNIPPET: Example HTTPS endpoint URL]
https://<region>-<project-id>.cloudfunctions.net/registerDevice
Any HTTP client can call this endpoint. For security, the app server issues a short-lived app server access token, and other HTTP APIs (except token issuance) must be called with Authorization: Bearer <token>. This mode is convenient for server-to-server integration and software tool development.
The second is the Firebase callable function. From Android, iOS, Web, or Flutter, the client can obtain a Functions instance and call:
let functions = Functions.functions(region: "asia-northeast1")
let registerDevice = functions.httpsCallable("registerDevice")
registerDevice.call(requestData) { result, error in … }
In this mode, Firebase handles authentication and transport, so there is no need to issue app server access token to the client. This is the recommended method for platforms that support Firebase SDK.
Cloud Firestore
Cloud Firestore is a scalable NoSQL cloud database based on Google Cloud, provided by Firebase. Here, it is used as the app server's database, storing device registrations, incoming call entries (Firestore-based "virtual push"), and call event logs. The exact collection and document structure can be customized in the source code. For this post, it is sufficient to know that Firestore stores the app server's state and logs.
FCM
FCM is a free messaging service provided by the Firebase platform. The app server built in this post uses it to send push notifications to platforms that support FCM, such as Android or certain desktop or web environments. When the app server receives an incoming call callback, it uses FCM to deliver a data message to the target device so that the client app can display an incoming call UI and proceed with PlanetKit call verification.
LINE Planet Console
LINE Planet Console (LPC) is a service for managing services developed using the LINE Planet SDK. It provides features such as usage and call history checking, service traffic monitoring, and API key and callback URL configuration and management. To deploy the app server after implementation, you need to sign up for LPC and prepare various items necessary for deploying the app server. This will be explained in detail later in the App server deployment preparation section.
App server feature introduction
This section presents a minimal app server design that demonstrates the core features necessary to use LINE Planet with PlanetKit. This is a reference implementation showing the essential client APIs and server callbacks.
This design represents one possible approach to building an app server. Depending on your service's requirements, you may need to:
- Add additional authentication and authorization layers
- Implement more sophisticated device management (e.g., handling multiple devices per user, device preferences)
- Add rate limiting and abuse prevention
- Implement custom business logic for call routing, user permissions, or billing
- Extend the data model to fit your service's specific needs
- Add monitoring, alerting, and analytics beyond the basic event logging shown here
Additionally, the code snippets provided in this post are simplified examples focusing on core functionality. Production implementations should include comprehensive error handling, input validation, logging, and security measures appropriate for your use case.
Now let's look at each app server function one by one.
Client APIs
The app server exposes four client APIs: RegisterDevice, RemoveDevice, IssuePlanetKitAccessToken, and IssueAppServerAccessToken. These APIs are all implemented as Cloud Functions and accessible both via HTTPS and Firebase callable functions.
RegisterDevice
Registers or updates a device for a given user and service so that incoming call notifications can be delivered to the registered device.
-
Request parameters
userId: User identifierserviceId: Service identifier from LPCdeviceType: Device platform (iOS, Android, Windows (desktop), Linux, etc.)deviceToken: Push notification tokenapplicationUserData: Optional custom data
-
Response parameters
result: Result code (SUCCESSor error code)message: Human-readable messagepath: Firestore document path where device was registered
Code example
const {onCall} = require("firebase-functions/v2/https");
const admin = require("firebase-admin");
const db = admin.firestore();

const registerDevice = onCall(async (request) => {
  const data = request.data;

  // 1. Validate required fields (userId, serviceId, deviceType, deviceToken)
  const required = ["userId", "serviceId", "deviceType", "deviceToken"];
  for (const field of required) {
    if (!data[field] || data[field].trim() === "") {
      return {
        result: "MISSING_REQUIRED_FIELD",
        message: `Missing required field: ${field}`,
      };
    }
  }

  // 2. Validate service ID exists in configuration
  // 3. Validate device type format
  // 4. Validate device token format

  // 5. Store device registration in Firestore
  // Path: services/{serviceId}/users/{userId}/devices/{deviceType}
  const deviceDoc = {
    deviceToken: data.deviceToken,
    applicationUserData: data.applicationUserData || null,
    registeredAt: admin.firestore.FieldValue.serverTimestamp(),
  };

  await db
    .collection("services")
    .doc(data.serviceId)
    .collection("users")
    .doc(data.userId)
    .collection("devices")
    .doc(data.deviceType)
    .set(deviceDoc);

  return {result: "SUCCESS", message: "Device registered successfully"};
});
RemoveDevice
Removes a device registration so that the device no longer receives incoming call notifications.
-
Request parameters
userId: User identifierserviceId: Service identifierdeviceType: Device platform to remove
-
Response fields
result: Result code (SUCCESS,DEVICE_NOT_FOUND, or error code)message: Human-readable message
Code example
const {onCall} = require("firebase-functions/v2/https");
const admin = require("firebase-admin");
const db = admin.firestore();

const removeDevice = onCall(async (request) => {
  const {userId, serviceId, deviceType} = request.data;

  // 1. Validate required fields
  const required = ["userId", "serviceId", "deviceType"];
  for (const field of required) {
    if (!request.data[field] || request.data[field].trim() === "") {
      return {
        result: "MISSING_REQUIRED_FIELD",
        message: `Missing required field: ${field}`,
      };
    }
  }

  // 2. Check if device exists
  const devicePath = db
    .collection("services")
    .doc(serviceId)
    .collection("users")
    .doc(userId)
    .collection("devices")
    .doc(deviceType);

  const deviceDoc = await devicePath.get();
  if (!deviceDoc.exists) {
    return {result: "DEVICE_NOT_FOUND", message: "Device not found"};
  }

  // 3. Delete the device document
  await devicePath.delete();

  // 4. Clean up user document if no devices remain
  const remainingDevices = await db
    .collection("services")
    .doc(serviceId)
    .collection("users")
    .doc(userId)
    .collection("devices")
    .get();

  if (remainingDevices.empty) {
    await db.collection("services").doc(serviceId)
      .collection("users").doc(userId).delete();
  }

  return {result: "SUCCESS", message: "Device removed successfully"};
});
IssuePlanetKitAccessToken
Issues a short-lived PlanetKit access token for a given user and service. This token is used when starting, accepting, or joining calls with PlanetKit.
-
Request parameters
userId: User identifierserviceId: Service identifier
-
Response parameters
result: Result code (SUCCESSor error code)message: Human-readable messageaccessToken: JWT token for PlanetKit authentication
Code example
const {onCall} = require("firebase-functions/v2/https");
const jwt = require("jsonwebtoken");

// Service configuration should be loaded from a secure config file
// Example structure: {"serviceId": {"apiKey": "...", "apiSecret": "..."}}
const serviceConfigs = require("./config/services.json");

const issuePlanetKitAccessToken = onCall(async (request) => {
  const {userId, serviceId} = request.data;

  // 1. Validate required fields
  if (!userId || !serviceId) {
    return {
      result: "MISSING_REQUIRED_FIELD",
      message: "userId and serviceId are required",
    };
  }

  // 2. Get API credentials from service configuration
  const credentials = serviceConfigs[serviceId];
  if (!credentials || !credentials.apiKey || !credentials.apiSecret) {
    return {
      result: "INVALID_SERVICE_ID",
      message: "Service configuration not found",
    };
  }

  // 3. Create JWT payload
  const payload = {
    sub: serviceId,              // subject: serviceId
    iss: credentials.apiKey,     // issuer: apiKey from LPC
    iat: Math.floor(Date.now() / 1000),  // issued at
    uid: userId,                 // user identifier
  };

  // 4. Sign with HMAC256 using API secret from LPC
  const token = jwt.sign(payload, credentials.apiSecret, {
    algorithm: "HS256",
    header: {typ: "JWT"},
  });

  return {
    result: "SUCCESS",
    message: "Access token generated successfully",
    accessToken: token,
  };
});
IssueAppServerAccessToken (optional)
Issues a short-lived app server access token for authenticating direct HTTPS calls to other app server APIs. This is only required when not using Firebase callable functions.
-
Request parameters
serviceId: Service identifierAPIKey: API key from LPC (for authentication)
-
Response parameters
result: Result code (SUCCESS,INVALID_API_KEY, or error code)message: Human-readable messageaccessToken: JWT token for app server API authentication
Code example
const {onRequest} = require("firebase-functions/v2/https");
const jwt = require("jsonwebtoken");

// Service configuration should be loaded from a secure config file
const serviceConfigs = require("./config/services.json");

const issueAppServerAccessToken = onRequest(async (req, res) => {
  const {serviceId, APIKey} = req.body;

  // 1. Validate API key matches service configuration
  const credentials = serviceConfigs[serviceId];
  if (!credentials || APIKey !== credentials.apiKey) {
    return res.status(401).json({
      result: "INVALID_API_KEY",
      message: "Invalid API key",
    });
  }

  // 2. Create JWT with expiration (e.g., 1 hour)
  const now = Math.floor(Date.now() / 1000);
  const payload = {
    sub: serviceId,
    iss: "app-server",
    iat: now,
    exp: now + 3600,  // 1 hour expiration
    type: "app-server-token",
  };

  const token = jwt.sign(payload, credentials.apiSecret, {
    algorithm: "HS256",
  });

  res.json({
    result: "SUCCESS",
    message: "App server access token generated successfully",
    accessToken: token,
  });
});
Server callbacks
LINE Planet cloud calls the app server when call-related events occur. These are called server callbacks and are implemented as Cloud Functions with HTTPS triggers that accept GET requests with query parameters.
For complete payload structure and field specifications, refer to the LINE Planet Callbacks documentation.
notifyCallback
Called when there is an incoming call for a user. When this callback is called, the app server looks up the devices registered for that user and sends notifications via APNs or FCM so that the client can display an incoming call screen and verify the call with PlanetKit.
-
Request parameters (
GETquery string)sid: Session ID (36 characters)from_service_id: Caller's service IDfrom_user_id: Caller's user IDto_service_id: Callee's service IDto_user_id: Callee's user IDtype: Call type ('A' for audio, 'V' for video)param: Call verification parameter (to be passed to PlanetKit ascc_param)app_svr_data: Optional application data
-
Authentication
- Custom header with key-value pair configured in LPC
Code example
const {onRequest} = require("firebase-functions/v2/https");
const admin = require("firebase-admin");
const db = admin.firestore();

// Authentication configuration for callbacks
const CALLBACK_AUTH_HEADER = "your-callback-auth-header";
const CALLBACK_AUTH_VALUE = "your-secret-value";

const notifyCallback = onRequest({cors: true}, async (req, res) => {
  // 1. Validate authentication header
  const authHeader = req.headers[CALLBACK_AUTH_HEADER.toLowerCase()];
  if (authHeader !== CALLBACK_AUTH_VALUE) {
    return res.status(401).json({
      result: "INVALID_CALLBACK_AUTH",
      message: "Invalid callback authentication",
    });
  }

  // 2. Parse and validate query parameters
  const {sid, from_service_id, from_user_id, to_service_id,
         to_user_id, type, param, app_svr_data} = req.query;

  // 3. Validate both users exist in registered devices
  const fromUserExists = await checkUserExists(from_service_id, from_user_id);
  const toUserExists = await checkUserExists(to_service_id, to_user_id);

  if (!fromUserExists || !toUserExists) {
    return res.status(404).json({
      result: "USER_NOT_FOUND",
      message: "User not found",
    });
  }

  // 4. Store callback data in Firestore for logging
  const callbackDoc = {
    sid,
    from_service_id,
    from_user_id,
    to_service_id,
    to_user_id,
    type,
    cc_param: param,  // Renamed for clarity
    app_svr_data,
    receivedAt: admin.firestore.FieldValue.serverTimestamp(),
  };

  await db.collection("notify_callbacks").add(callbackDoc);

  // 5. Send push notifications to callee's devices
  // This function looks up all devices for to_user_id and sends:
  // - APNs VoIP push for iOS devices
  // - FCM data message for Android devices
  const pushResult = await sendPushNotificationsToUser(
    to_service_id,
    to_user_id,
    callbackDoc,
    sid
  );

  res.json({
    result: "SUCCESS",
    message: "Notify callback processed successfully",
    pushNotifications: pushResult,
  });
});

// Helper function to check if user exists
async function checkUserExists(serviceId, userId) {
  const userDoc = await db
    .collection("services")
    .doc(serviceId)
    .collection("users")
    .doc(userId)
    .get();
  return userDoc.exists;
}
callEventCallback
Called when a 1-to-1 call ends. The app server records call statistics such as start time, end time, duration, and disconnect reason in Firestore for later monitoring and analysis. For detailed information about each parameter, refer to the 1-to-1 Call Event Callback documentation.
- Request parameters (
GETquery string)sid: Session IDfrom_service_id,from_user_id: Caller identifiersto_service_id,to_user_id: Callee identifierstype: Media type ('A' or 'V')setup_time,start_time,end_time: Call setup, start, and end time (Unix timestamps)duration: Call duration in secondssrcip,dstip: Caller and callee IP addressesterminate: Q.850 cause coderel_code: Detailed call release coderel_code_str: Detailed call release messagebilling_sec: Billable call time in secondsdisconnect_reason: Call disconnect reasonreleaser_type: Call termination source type- Additional fields:
rc_idc(IDC that handled the caller),user_rel_code(application-defined call release code),app_svr_data(application data), etc.
Code example
const {onRequest} = require("firebase-functions/v2/https");
const admin = require("firebase-admin");
const db = admin.firestore();

// Authentication configuration for callbacks
const CALLBACK_AUTH_HEADER = "your-callback-auth-header";
const CALLBACK_AUTH_VALUE = "your-secret-value";

const callEventCallback = onRequest({cors: true}, async (req, res) => {
  // 1. Validate authentication header
  const authHeader = req.headers[CALLBACK_AUTH_HEADER.toLowerCase()];
  if (authHeader !== CALLBACK_AUTH_VALUE) {
    return res.status(401).json({
      result: "INVALID_CALLBACK_AUTH",
      message: "Invalid callback authentication",
    });
  }

  // 2. Parse query parameters
  const data = req.query;

  // 3. Validate users exist
  const fromUserExists = await checkUserExists(
    data.from_service_id,
    data.from_user_id
  );
  const toUserExists = await checkUserExists(
    data.to_service_id,
    data.to_user_id
  );

  if (!fromUserExists || !toUserExists) {
    return res.status(404).json({
      result: "USER_NOT_FOUND",
      message: "User not found",
    });
  }

  // 4. Store call event in Firestore for analytics
  const callEventDoc = {
    sid: data.sid,
    from_service_id: data.from_service_id,
    from_user_id: data.from_user_id,
    to_service_id: data.to_service_id,
    to_user_id: data.to_user_id,
    type: data.type,
    setup_time: parseInt(data.setup_time, 10),
    start_time: parseInt(data.start_time, 10),
    end_time: parseInt(data.end_time, 10),
    duration: parseInt(data.duration, 10),
    srcip: data.srcip,
    dstip: data.dstip,
    terminate: parseInt(data.terminate, 10),
    rel_code: parseInt(data.rel_code, 10),
    rel_code_str: data.rel_code_str,
    billing_sec: parseInt(data.billing_sec, 10),
    disconnect_reason: parseInt(data.disconnect_reason, 10),
    releaser_type: parseInt(data.releaser_type, 10),
    receivedAt: admin.firestore.FieldValue.serverTimestamp(),
  };

  await db.collection("call_events").add(callEventDoc);

  res.json({
    result: "SUCCESS",
    message: "Call event callback processed successfully",
  });
});

// Helper function to check if user exists
async function checkUserExists(serviceId, userId) {
  const userDoc = await db
    .collection("services")
    .doc(serviceId)
    .collection("users")
    .doc(userId)
    .get();
  return userDoc.exists;
}
groupCallEventCallback
Called for group call events such as participants joining, leaving, or the call ending. The app server maintains per-session summary information and detailed event logs so group call behavior can be analyzed. For detailed information about each parameter, refer to the Group Call Event Callback documentation.
- Request parameters (
GETquery string)sid: Session ID (32-36 characters for group calls)svc_id: Group call service IDid: Group call IDuser_svc_id,user_id: Participant identifiershost_svc_id,host_id: Host identifierssc: Group call status code ('S' = Started, 'C' = Changed, 'E' = Ended)msc: Participant status code ('C' = Connected, 'D' = Disconnected, 'T' = Timeout, 'M' = Media changed)setup_time,start_time,end_time: Call setup, start, and end timeonline: Number of online participantsmedia_type: Media type ('A' or 'V')ts: Event timestamp- Additional fields:
ue_type(user endpoint type),display_name(user endpoint display name),mtg_data(meeting data specified at meeting creation), etc.
Code example
const {onRequest} = require("firebase-functions/v2/https");
const admin = require("firebase-admin");
const db = admin.firestore();

// Authentication configuration for callbacks
const CALLBACK_AUTH_HEADER = "your-callback-auth-header";
const CALLBACK_AUTH_VALUE = "your-secret-value";

const groupCallEventCallback = onRequest({cors: true}, async (req, res) => {
  // 1. Validate authentication header
  const authHeader = req.headers[CALLBACK_AUTH_HEADER.toLowerCase()];
  if (authHeader !== CALLBACK_AUTH_VALUE) {
    return res.status(401).json({
      result: "INVALID_CALLBACK_AUTH",
      message: "Invalid callback authentication",
    });
  }

  // 2. Parse and validate query parameters
  const data = req.query;

  // 3. Validate user and host exist
  const userExists = await checkUserExists(data.user_svc_id, data.user_id);
  const hostExists = await checkUserExists(data.host_svc_id, data.host_id);

  if (!userExists || !hostExists) {
    return res.status(404).json({
      result: "USER_NOT_FOUND",
      message: "User not found",
    });
  }

  // 4. Store event in session-based structure for accumulation
  // Structure: group_call_events/{sid}/events/{auto-id}
  const groupCallEventDoc = {
    sid: data.sid,
    svc_id: data.svc_id,
    id: data.id,
    user_svc_id: data.user_svc_id,
    user_id: data.user_id,
    host_svc_id: data.host_svc_id,
    host_id: data.host_id,
    sc: data.sc,
    msc: data.msc,
    setup_time: parseInt(data.setup_time, 10),
    start_time: parseInt(data.start_time, 10),
    end_time: parseInt(data.end_time, 10),
    online: parseInt(data.online, 10),
    media_type: data.media_type,
    ts: parseInt(data.ts, 10),
    receivedAt: admin.firestore.FieldValue.serverTimestamp(),
  };

  const sessionRef = db.collection("group_call_events").doc(data.sid);

  // Add event to subcollection
  await sessionRef.collection("events").add(groupCallEventDoc);

  // 5. Update session summary document
  const sessionSummary = {
    sid: data.sid,
    svc_id: data.svc_id,
    group_call_id: data.id,
    host_svc_id: data.host_svc_id,
    host_id: data.host_id,
    media_type: data.media_type,
    latest_sc: data.sc,
    latest_online_count: parseInt(data.online, 10),
    setup_time: parseInt(data.setup_time, 10),
    latest_event_time: parseInt(data.ts, 10),
    call_ended: data.sc === "E",
    lastUpdatedAt: admin.firestore.FieldValue.serverTimestamp(),
    total_events: admin.firestore.FieldValue.increment(1),
  };

  await sessionRef.set(sessionSummary, {merge: true});

  res.json({
    result: "SUCCESS",
    message: "Group call event callback processed successfully",
  });
});

// Helper function to check if user exists
async function checkUserExists(serviceId, userId) {
  const userDoc = await db
    .collection("services")
    .doc(serviceId)
    .collection("users")
    .doc(userId)
    .get();
  return userDoc.exists;
}
App server deployment preparation
Before deploying the app server, two things must be prepared. One is to sign up for LINE Planet Console (LPC) and prepare the necessary items for LINE Planet project configuration, and the other is to prepare Firebase for hosting the app server. Once both are prepared, the app server source code can be configured. Let's look at how to prepare each one.
LPC
Sign up and log in to LPC
LPC is where you create and manage LINE Planet projects. Access the following LPC website in a browser, sign up, and log in.
Acquire service ID
When integrating with LINE Planet, you can choose and apply one of two execution environments (Evaluation/Real) provided by LINE Planet.
- Evaluation environment
- A separate verification/testing environment provided by LINE Planet (it does not refer to a staging environment operated separately by each service). It can be used for integration development, feature verification, QA, and internal testing before applying actual production traffic.
- You can acquire a service ID from LPC.
- Real environment (production)
- A production environment that handles actual user traffic, used during service launch and operation stages.
- The Real environment can be accessed after contacting the LINE Planet team (email: dl_planet_help@linecorp.com).
The recommended workflow is to complete integration and verification in the Evaluation environment, then switch to the Real environment when production readiness is achieved.

Issue API key and secret
In the same LPC project, issue an API key and API secret for the service. The API key and API secret are used when the app server communicates with LINE Planet cloud on behalf of the service, so store them securely as they will be needed later when configuring the app server.
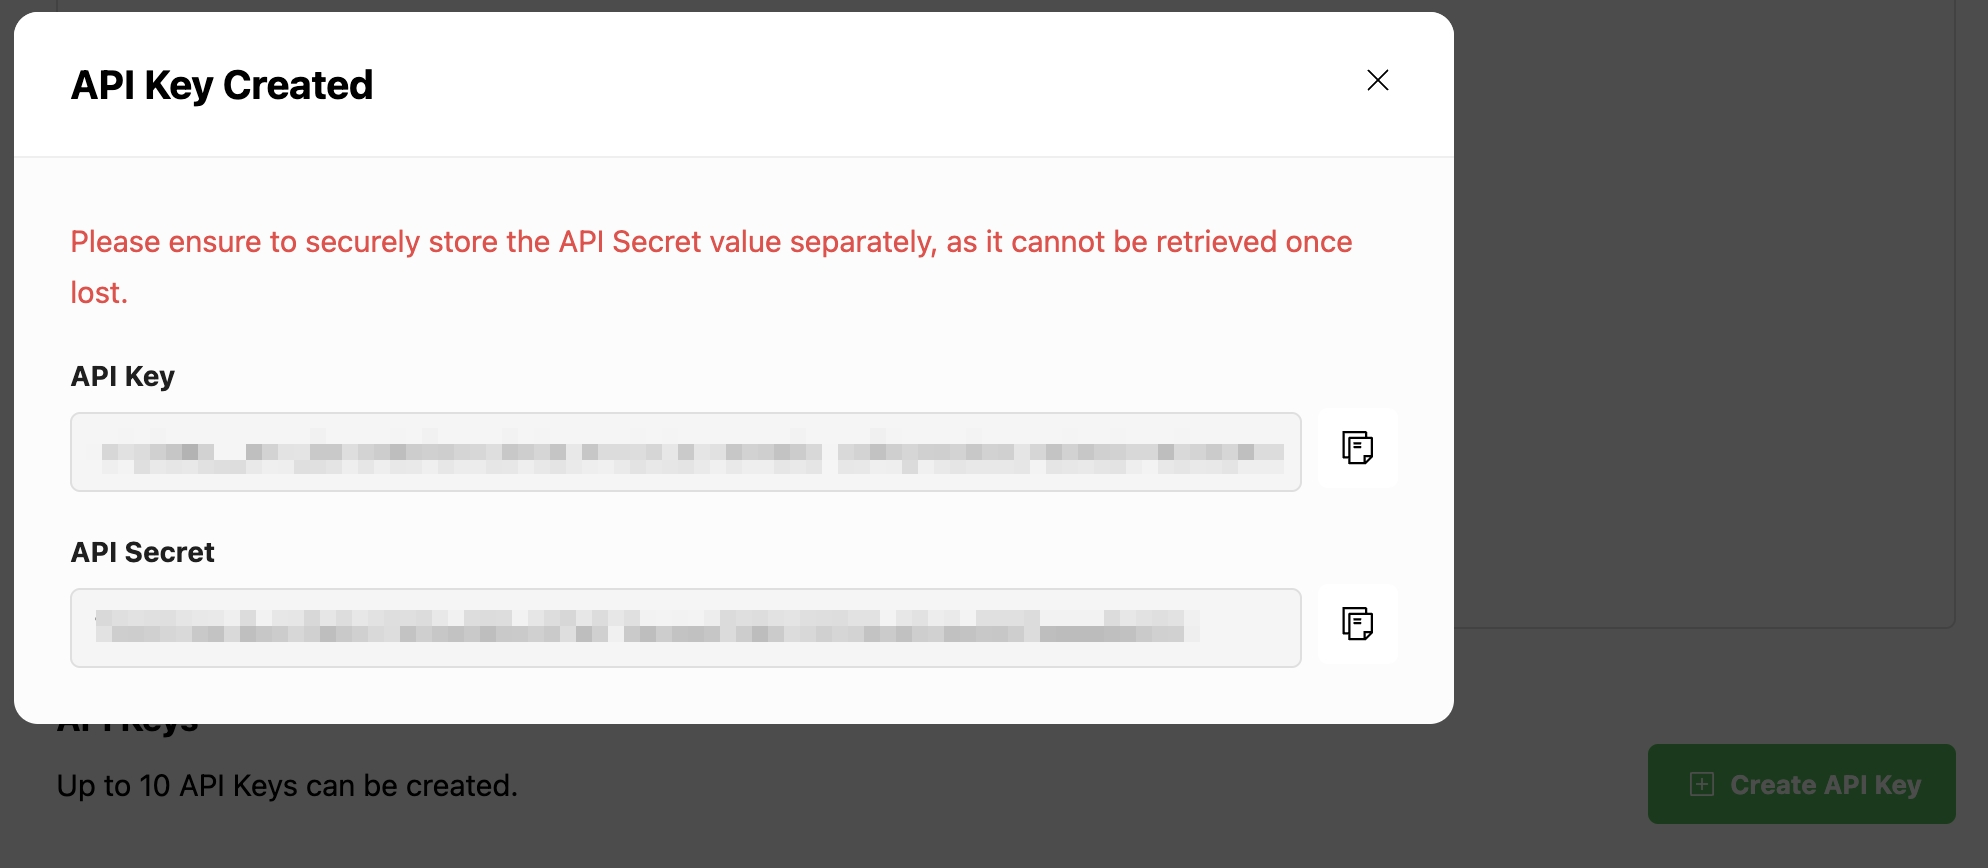
Note: Be sure to copy and save the API secret before closing this dialog. Once the dialog is closed, you cannot view this API secret again.
Firebase
Prepare a Firebase project
If your service is already using Firebase, you can reuse the existing project for the app server. In this case, skip project creation and use the existing Firebase project that the app is already connected to. If you don't have a Firebase project yet, create a new project dedicated to the LINE Planet app server. This project is for hosting Cloud Functions and Firestore database used by the app server.
For details, refer to the official Firebase guides:
Enable Firebase Cloud Functions
In the Firebase console, open the Functions section. If needed, switch to a billing plan (for example, Blaze) that allows the use of Cloud Functions. In the Functions section, confirm that Cloud Functions is enabled and that the Firebase CLI can deploy to this project.
For details, refer to the official Firebase guides:
Enable Firestore
Open the Firestore Database section and create a database if it is not already enabled. Choose an appropriate region, such as asia-northeast1, and set the initial security mode. This database will be used by the app server to store device registrations and call events.
For details, refer to the official Firebase guide:
Set up a push for the desired platform
For iOS and iPadOS, obtain an APNs Auth Key (.p8) from the Apple Developer portal, then configure FCM for Apple platforms. For Android, register the app in Firebase, download google-services.json, and configure FCM in the client project. For desktop or other platforms, decide whether to use FCM or Firestore-based notification.
For setup steps, refer to the official Firebase guides:
Deploy the app server
After implementing all the app server functions following the patterns introduced in the App server feature introduction section, you can now deploy the app server functions to Firebase and connect them to LINE Planet cloud.
Implement Cloud Functions
Referring to the code snippets introduced in the App server feature introduction section, implement the following Cloud Functions for Firebase in your project:
- Client APIs
registerDevice(Firebase callable function)registerDeviceHttp(HTTP with authentication)removeDevice(Firebase callable function)removeDeviceHttp(HTTP with authentication)issuePlanetKitAccessToken(Firebase callable function)issuePlanetKitAccessTokenHttp(HTTP with authentication)issueAppServerAccessToken(HTTP)
- Server callbacks
notifyCallback(HTTPGETendpoint)callEventCallback(HTTPGETendpoint)groupCallEventCallback(HTTPGETendpoint)
- Required configuration
- Configure server callback authentication header (key-value pair)
- Configure service credentials (API key and API secret from LPC)
- Configure APNs credentials for iOS push (if supporting iOS)
- Set up Firestore collections for device registration and event logging
Deploy Cloud Functions
Run the following command in the functions directory using Firebase CLI to deploy all functions:
firebase deploy --only functions
To deploy only a specific function:
firebase deploy --only functions:registerDevice
Logs can be checked with the following command:
firebase functions:log
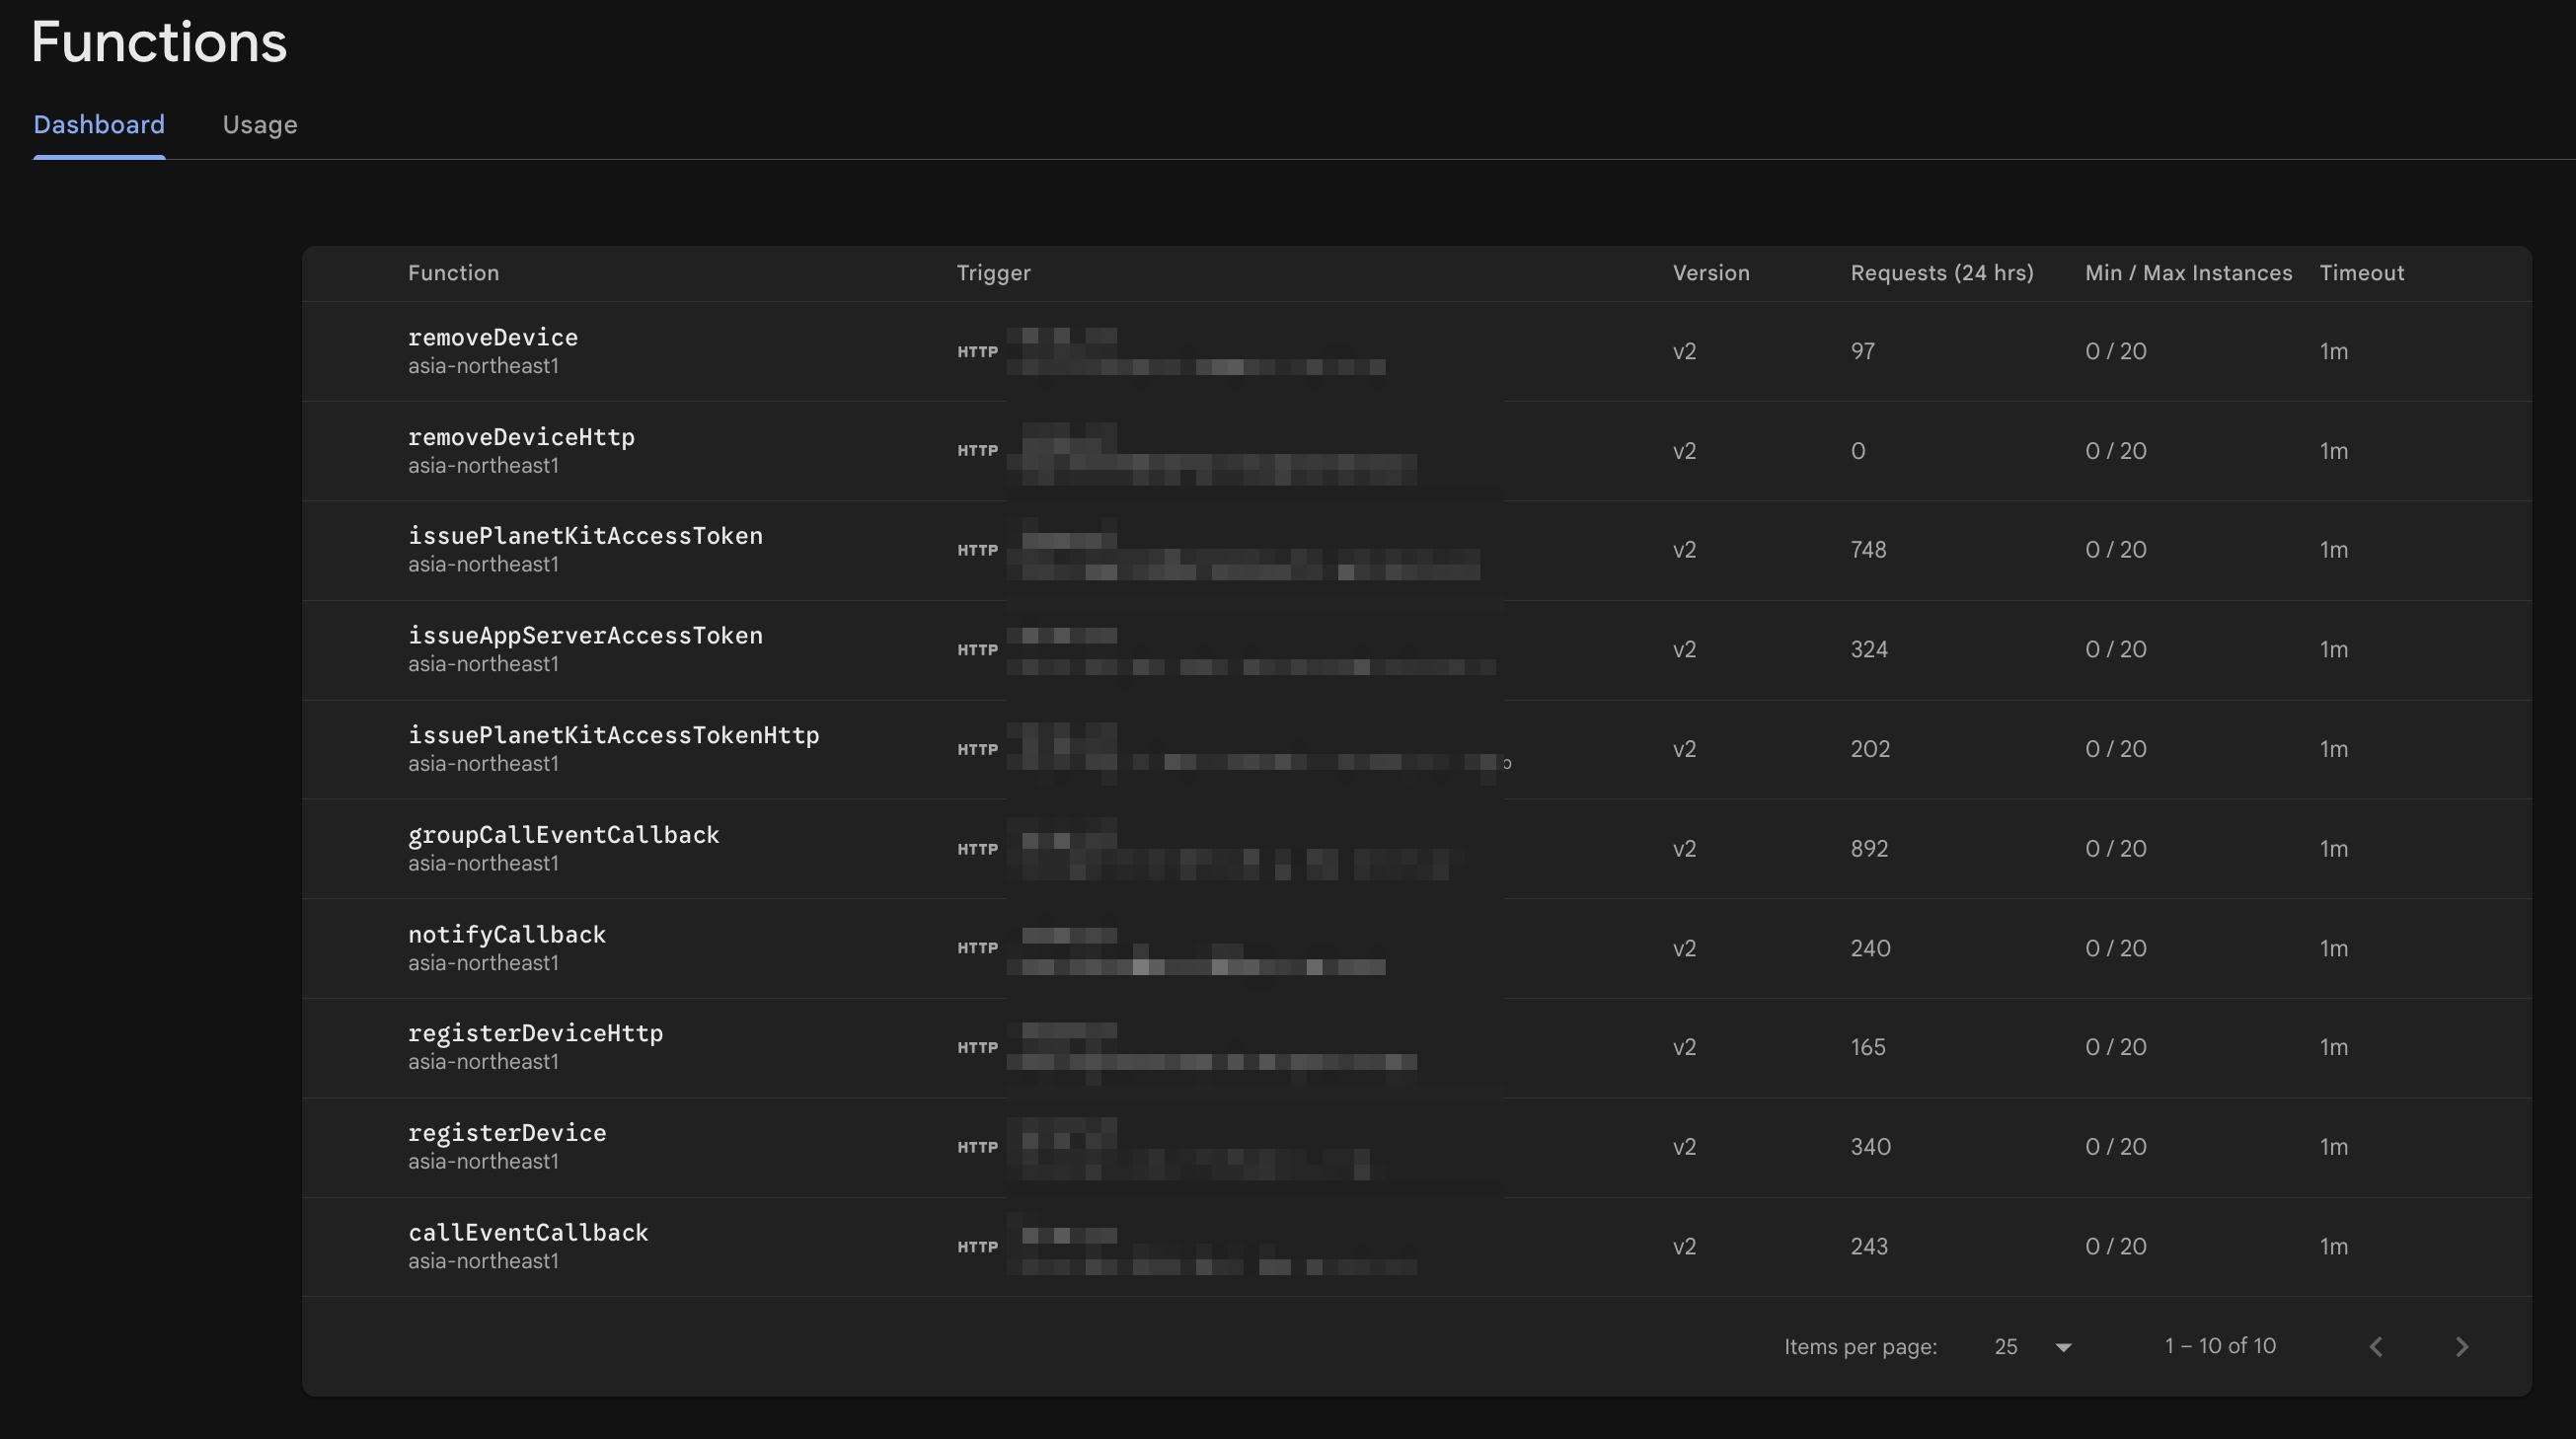
Register callbacks and the header
After deploying Cloud Functions, once the URLs are visible in the Functions tab of the Firebase console, you need to register the callbacks in LPC.
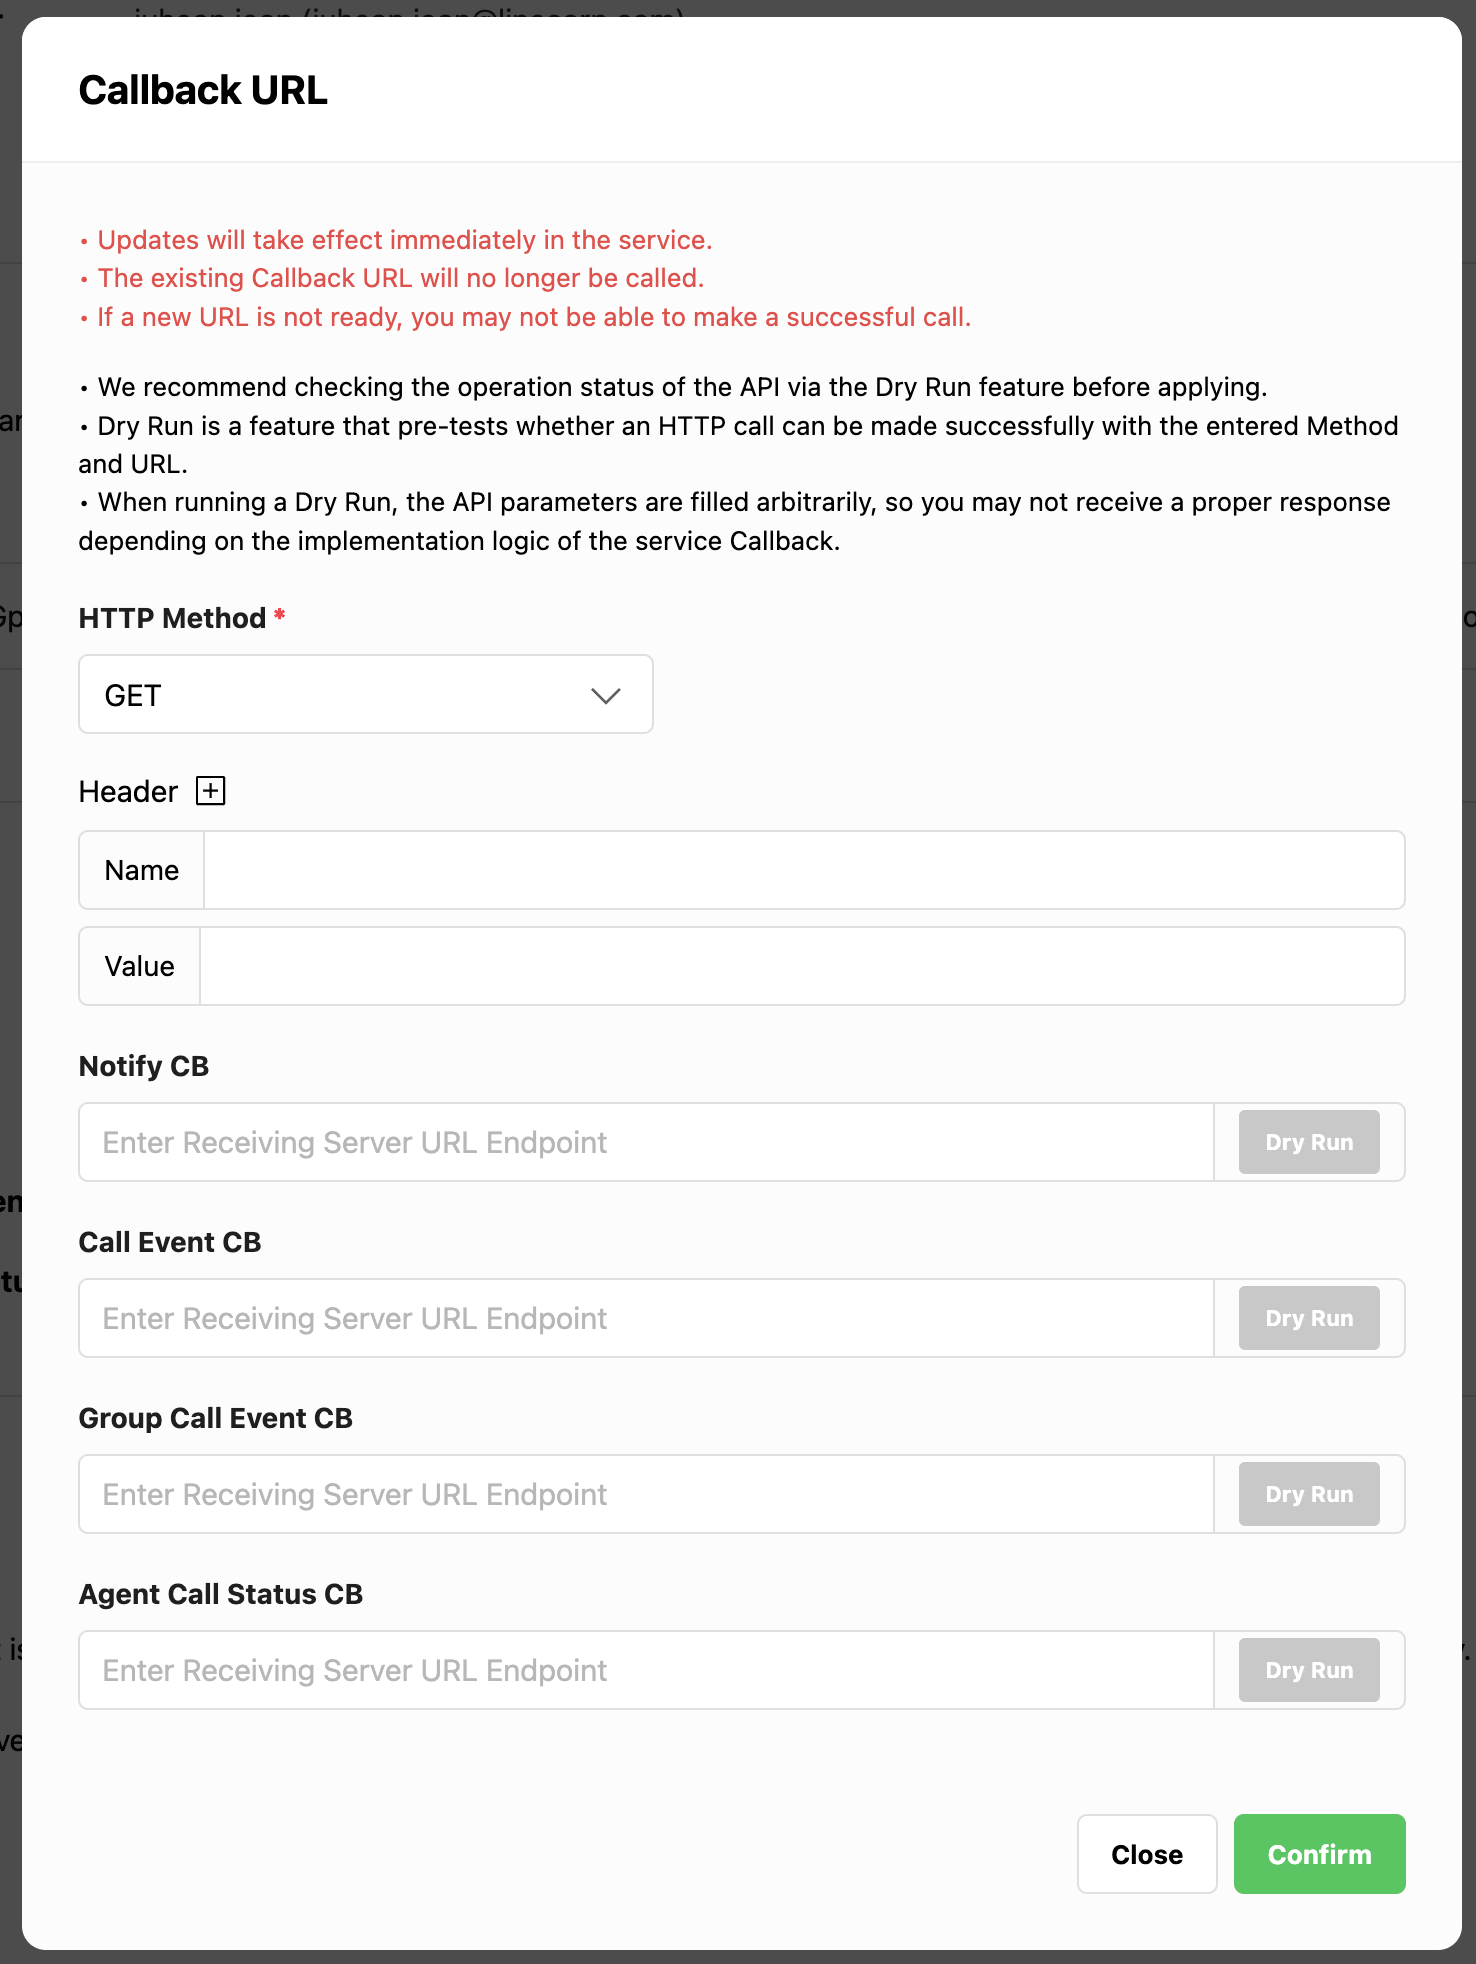
Open the callback configuration page for the service in LPC and set the following:
- Set
notifyCallbackURL to the corresponding Cloud Function - Set
callEventCallbackURL to the corresponding Cloud Function - Set
groupCallEventCallbackURL if using group calls
After completing the configuration, set the authentication header to match the SERVER_CALLBACK_AUTH value in constants.js (for example, key planet and a secret value). After saving, LINE Planet cloud will be able to call the app server, and the app server will be able to verify that the requests are genuine.
Integrating your client app with the app server
After completing deployment and callback registration, client applications can start using the app server.
Firebase SDK integration
On Android, include Firebase Functions and Messaging in Gradle. On iOS, include FirebaseCore, FirebaseFunctions, and FirebaseMessaging via CocoaPods (or Swift Package Manager). Then initialize Firebase and create a Functions instance in the appropriate region.
[CODE SNIPPET: Android Firebase dependencies]
implementation platform("com.google.firebase:firebase-bom:<VERSION>")
implementation "com.google.firebase:firebase-functions"
implementation "com.google.firebase:firebase-messaging"
[CODE SNIPPET: iOS Firebase dependencies]
pod 'Firebase/Core'
pod 'Firebase/Functions'
pod 'Firebase/Messaging'
[CODE SNIPPET: Swift – Functions instance]
import FirebaseFunctions

let functions = Functions.functions(region: "asia-northeast1")
[CODE SNIPPET: Kotlin – Functions instance]
import com.google.firebase.functions.ktx.functions
import com.google.firebase.ktx.Firebase

val functions = Firebase.functions("asia-northeast1")
Swift/Kotlin example: Making calls (call creation and verification)
The basic pattern on the client side is simple:
- Register the device once the user is logged in and a push token is available.
- Before making or verifying a call, request a PlanetKit access token.
- Pass the token and callback parameters to PlanetKit.
Swift example
[CODE SNIPPET: Swift – register device and issue token]

// On user login or push token update, call registerDevice.
let registerDevice = functions.httpsCallable("registerDevice")
let registerData: [String: Any] = [
  "userId": "user123",
  "serviceId": "<SERVICE_ID>",
  "deviceType": "IOS",
  "pushType": "PUSHKIT",
  "deviceToken": "<PUSH_TOKEN>",
  "pushkitEnvironment": "DEBUG"
]
registerDevice.call(registerData) { result, error in
  // Handle result or error
}

// Before making or verifying a call, call issuePlanetKitAccessToken
let issueToken = functions.httpsCallable("issuePlanetKitAccessToken")
let tokenData: [String: Any] = [
  "userId": "user123",
  "serviceId": "<SERVICE_ID>"
]
issueToken.call(tokenData) { result, error in
  // Extract "accessToken" and pass it to PlanetKit
}
Kotlin example
// On user login or push token update, call registerDevice.
val registerData = hashMapOf(
    "userId" to "user123",
    "serviceId" to "<SERVICE_ID>",
    "deviceType" to "ANDROID",
    "pushType" to "FCM",
    "deviceToken" to "<FCM_TOKEN>"
)
functions
    .getHttpsCallable("registerDevice")
    .call(registerData)
    .addOnSuccessListener { /* Handle success */ }
    .addOnFailureListener { /* Handle error */ }

// Before making or verifying a call, call issuePlanetKitAccessToken
val tokenData = hashMapOf(
    "userId" to "user123",
    "serviceId" to "<SERVICE_ID>"
)
functions
    .getHttpsCallable("issuePlanetKitAccessToken")
    .call(tokenData)
    .addOnSuccessListener { result ->
        // Extract "accessToken" and pass it to PlanetKit
    }
    .addOnFailureListener { /* Handle error */ }
Incoming calls follow a similar pattern. LINE Planet cloud calls notifyCallback, the app server sends a push, the client receives it and displays an incoming call UI, then fetches a PlanetKit access token and verifies the call via PlanetKit.
For detailed PlanetKit usage, including how to use fields such as cc_param during verification, please refer to the PlanetKit SDK documentation.
Closing
This post introduced a high-level guide to implementing the app server required for LINE Planet usage using Firebase.
Implementing an app server using Firebase offers several key advantages:
- Efficiency: You can skip many of the cumbersome tasks traditionally required for server setup and maintenance, such as server provisioning, OS management, and authentication.
- Scalability: Firebase automatically scales your server resources up or down based on traffic (auto-scaling), ensuring stable service performance without manual intervention even during sudden traffic spikes.
These advantages allow developers to focus more on core business logic rather than spending time on infrastructure management. Although this guide focuses on Firebase, the architectural patterns and core logic can be applied to other serverless platforms such as AWS Lambda or Azure Functions, and you can adapt the API designs and callback flows to your preferred environment.
Finally, here's a summary of the key points from this post:
- The app server's role
- Provides client APIs
- Receives callbacks from LINE Planet cloud
- Delivers incoming call notifications to the callee (client) app via push
- Using Cloud Functions for Firebase that can be called in two ways (HTTPS, Firebase callable functions), and using Cloud Firestore as the app server's data store
- Minimal API design for app server features required by LINE Planet
- Client APIs (
RegisterDevice,RemoveDevice,IssuePlanetKitAccessToken,IssueAppServerAccessToken)- Includes code snippets for core validation, token generation, and Firestore operations
- Server callbacks (
notifyCallback,callEventCallback,groupCallEventCallback)- Includes code snippets for authentication, data validation, event logging, and push notification patterns
- Client APIs (
- Concrete steps to prepare LPC and Firebase, implement the functions, deploy them, and register callbacks
- Basic examples to understand how client apps can call the app server via Firebase SDK and use the results with PlanetKit
If you have any questions or feedback about the Firebase-based LINE Planet app server implementation guide introduced in this post, please contact us at the following email address:
- Contact: dl_planet_help@linecorp.com